Integration testing is a type of software testing essential for validating the interactions between different components of an application, ensuring they work together as expected. The main goal of integration testing is to identify any issues that may arise when these components interact with each other.
What are these components?
For example: databases, caches, message queues, APIs, external services, etc.
What is the difference between unit and integration testing?
- Unit Testing: typically uses mocks or stubs to simulate dependencies, ensuring the test environment is controlled and isolated.
- Integration Testing: uses actual implementations of dependencies like databases, message queues, external services, and APIs to validate real interactions.
In this blog post, I will share my experience and tell you what are, in my opinion, the best practices for integration testing in ASP.NET Core applications. I will give you the tips I gained during more than 10 years of experience of creating production applications and writing integration tests for them. After reading this blog post, you will be able to write integration tests that are useful, are easy and fun to write, and a pleasure to maintain.
The system we will be testing
Today I'll show you how to write integration tests for a ShippingService that is responsible for creating and updating shipments for purchased products.
ShippingService implements the following use cases, available through webapi:
1. Create shipment: saves shipment details to the database, publishes ShipmentCreatedEvent to a RabbitMQ and returns a shipment number.
2. Update shipment status: updates the status of a shipment in the database and publishes ShipmentStatusUpdatedEvent to a RabbitMQ.
3. Get shipment by number: returns a shipment from a database by a number.
ShippingService has the following integrations:
- Postgres database, using EF Core.
- RabbitMQ, using MassTransit.
Each use case exposes a webapi endpoint implemented by ASP.NET Core Minimal APIs. Each endpoint uses MediatR to publish a corresponding Command or Query to implement the use case.
Let's have a look at implementations of "Create Shipment" use case.
The "Create Shipment" endpoint validates a request and sends a CreateShipmentCommand:
app.MapPost("/api/shipments",

    async (

        [FromBody] CreateShipmentRequest request,

        IValidator<CreateShipmentRequest> validator,

        IMediator mediator) =>

    {

        var validationResult = await validator.ValidateAsync(request);

        if (!validationResult.IsValid)

        {

            return Results.ValidationProblem(validationResult.ToDictionary());

        }


        var command = new CreateShipmentCommand(

            request.OrderId,

            request.Address,

            request.Carrier,

            request.ReceiverEmail,

            request.Items);


        var response = await mediator.Send(command);

        if (response.IsError)

        {

            return response.Errors.ToProblem();

        }


        return Results.Ok(response.Value);

    });
Let's explore the command handler Handle method:
public async Task<ErrorOr<CreateShipmentResponse>> Handle(

    CreateShipmentCommand request,

    CancellationToken cancellationToken)

{

    var shipmentAlreadyExists = await context.Shipments

        .Where(s => s.OrderId == request.OrderId)

        .AnyAsync(cancellationToken);


    if (shipmentAlreadyExists)

    {

        logger.LogInformation("Shipment for order '{OrderId}' is already created", request.OrderId);

        return Error.Conflict($"Shipment for order '{request.OrderId}' is already created");

    }


    var shipmentNumber = new Faker().Commerce.Ean8();

    var shipment = CreateShipment(request, shipmentNumber);


    context.Shipments.Add(shipment);

    var shipmentCreatedEvent = CreateShipmentCreatedEvent(shipment);

    await publishEndpoint.Publish(shipmentCreatedEvent, cancellationToken);

    await context.SaveChangesAsync(cancellationToken);

    logger.LogInformation("Created shipment: {@Shipment}", shipment);


    return new ShipmentResponse(

        shipment.Number,

        shipment.OrderId,

        shipment.Address,

        shipment.Carrier,

        shipment.ReceiverEmail,

        shipment.Status,

        shipment.Items);

}
Now let's explore the best practises for integration testing in ASP.NET Core.
Best practice 1: Use XUnit for writing tests
XUnit library is the best choice for integration testing. When compared to NUnit, XUnit provides a more straightforward control over the test's lifetime. In XUnit, a Tests class is created and disposed per each test; that way cleanup for each test is very straightforward. In constructor, you can write a setup code, in Dispose method — make clean up. This is a huge advantage when compared to NUnit.
For assertions inside tests, I recommend using FluentAssertions Library. And if you want to generate some fake data for your tests, I recommend using Bogus.
<PackageReference Include="Bogus" Version="35.5.1" />

<PackageReference Include="FluentAssertions" Version="6.12.0" />

<PackageReference Include="xunit" Version="2.9.0" />

<PackageReference Include="xunit.runner.visualstudio" Version="2.8.2">

  <PrivateAssets>all</PrivateAssets>

  <IncludeAssets>runtime; build; native; contentfiles; analyzers; buildtransitive</IncludeAssets>

</PackageReference>
Best practise 2: No mocks, test real integrations
Use real databases, caches, message queues, APIs, external services to make sure that your application integrates with them all successfully. Integration Testing aims to verify the interfaces and interactions of your application with different components, ensuring they work all together as a cohesive system.
Have you ever experienced an issue when your application crashes when starting or when receiving a web request, after all Unit Tests succeeded? I have, hundreds of times. This happens because Unit Tests are run in an isolated environment.
Imagine you've made changes in your Domain Entities and forgot to update the database mapping or a migration. Unit Tests pass as they mock interaction with a database.
If you have integration tests in place, you won't experience such an issue. When writing integration tests - you run your actual application and send requests to it. That way you can test your application use cases from start to finish — from the web api call right to the database query.
There are 2 main approaches for writing integration tests:
- Testing webapi calls to your application
- Testing interaction with a particular external dependency, for example, database.
In this blog post, we will focus on the first option. The second option is useful to test complex logic inside your repositories against a real database.
Remember, mocks are only suitable for Unit Tests that run in an isolated environment.
Best practice 3: Use WebApplicationFactory
The WebApplicationFactory class is essential for creating a test server that runs your application in memory that is very close to the real environment. This class is a modern way-to-go for creating integration tests in ASP.NET Core.
WebApplicationFactory is available in the following Nuget package:
<PackageReference Include="Microsoft.AspNetCore.Mvc.Testing" Version="8.0.7" />
Here is a structure of such a factory:
public class CustomWebApplicationFactory : WebApplicationFactory<IApiMarker>, IAsyncLifetime

{

    public async Task InitializeAsync()

    {

    }


    public new async Task DisposeAsync()

    {

    }


    protected override void ConfigureWebHost(IWebHostBuilder builder)

    {

    }

}
WebApplicationFactory runs your application instance in memory. It builds the real DI container and executes all the code of your application from the Program.cs. Here an IApiMarker is just a marker interface that tells WebApplicationFactory in which assembly to look for a Program.cs that runs the application.
You can use an InitializeAsync and DisposeAsync methods to control the lifetime of your application. ConfigureWebHost allows you to reconfigure services in your DI container.
We will see these all in action a bit later.
Finally, you need to create a CollectionDefinition and add it to all the integration tests:
[CollectionDefinition("ShippingTests")]

public class SharedTestCollection : ICollectionFixture<CustomWebApplicationFactory>;


[Collection("ShippingTests")]

public class CreateShipmentTests : IAsyncLifetime

{

    public CreateShipmentTests(CustomWebApplicationFactory factory) {}

}
This is essential for XUnit to use the same CustomWebApplicationFactory across all the tests.
Best practice 4: Use TestContainers library to run the integrations
With the WebApplicationFactory and the TestContainers library it has never been easier to write and run the integration tests. As you already know, for integration tests, you need to run the real database and other external services.
One way is to have a dedicated server that runs the real database, cache, message queue, etc. And you can run your tests on this server to test your integrations.
But this approach has a lot of drawbacks:
- you need to maintain this server
- how are you going to create and clean up the database on the server?
- you can have conflicts if you run integration tests in parallel for different applications
TestContainers library offers a more elegant and easier way to run the integration tests. It allows you to run all your external services as docker containers, as you probably love doing in development.
To get started with TestContainers, you need to install the following Nuget packages for testing the ShippingService:
<PackageReference Include="Testcontainers" Version="3.9.0" />

<PackageReference Include="Testcontainers.PostgreSql" Version="3.9.0" />

<PackageReference Include="Testcontainers.RabbitMq" Version="3.9.0" />
If you search for "Testcontainers" in the Nuget package manager in the IDE of your choice, you gonna find a lot of packages with different databases, caches, message queues, authentication providers, and so on. We will use two containers: PostgreSql and RabbitMq.
Next, you need to create and run the containers in the CustomWebApplicationFactory:
public class CustomWebApplicationFactory : WebApplicationFactory<IApiMarker>, IAsyncLifetime

{

    private readonly PostgreSqlContainer _dbContainer = new PostgreSqlBuilder()

            .WithImage("postgres:latest")

            .WithDatabase("test")

            .WithUsername("admin")

            .WithPassword("admin")

            .Build();


    private readonly RabbitMqContainer _rabbitMqContainer = new RabbitMqBuilder()

        .WithImage("rabbitmq:3-management")

        .WithPortBinding(8080, true)

        .WithUsername("guest")

        .WithPassword("guest")

        .Build();


    public HttpClient HttpClient { get; private set; } = null!;


    public async Task InitializeAsync()

    {

        await _dbContainer.StartAsync();

        await _rabbitMqContainer.StartAsync();


        HttpClient = CreateClient();

    }


    public new async Task DisposeAsync()

    {

        await _dbContainer.DisposeAsync();

        await _rabbitMqContainer.DisposeAsync();

    }

}
You need to start the containers in the InitializeAsync method and dispose them in the DisposeAsync method.
Best practice 5: Use Environment variables to update connections to the test containers
If your search for integration tests examples in ASP.NET Core with TestContainers, you will probably find examples that remove and re-add a lot of dependencies in the ConfigureWebHost method of WebApplicationFactory.
To be able to connect to the database running in the test container, you may do the following:
protected override void ConfigureWebHost(IWebHostBuilder builder)

{

    builder.ConfigureServices(services =>

    {

        services.Remove(services.SingleOrDefault(service => typeof(DbContextOptions<EfCoreDbContext>) == service.ServiceType));

        services.Remove(services.SingleOrDefault(service => typeof(DbConnection) == service.ServiceType));

        services.AddDbContext<ApplicationDbContext>((_, option) => option.UseNpgsql(_connectionString));

    });

}
For such a simple use case, it's not a big deal, but if you have a much more complex setup and more dependencies? From my experience, I can tell you that you can spend even hours trying to remove and re-add the dependencies, each time running your tests and getting fails after fails. Especially, this can be hard if you work with the code written by someone else or even the other team.
I want to share with you a much simpler approach, which is my favourite way to reconfigure the application to connect to the test containers. All you need to do is to examine the appsettings.json for configured connections to the external services:
{

  "ConnectionStrings": {

    "Postgres": "Server=127.0.0.1;Port=5432;Database=shipping;User Id=admin;Password=admin;"

  },

  "RabbitMQConfiguration": {

    "Host": "amqp://rabbitmq:5672",

    "Username": "guest",

    "Password": "guest"

  }

}
In ASP.NET Core you can use the environment variables to reassign your configuration, that comes from the appsetting.json and other sources.
Let's use this approach to change the connection strings by setting environment variables:
protected override void ConfigureWebHost(IWebHostBuilder builder)

{

    Environment.SetEnvironmentVariable("ConnectionStrings:Postgres", _dbContainer.GetConnectionString());

    Environment.SetEnvironmentVariable("RabbitMQConfiguration:Host", _rabbitMqContainer.GetConnectionString());

}
That's it, no matter how many components use connection to the Postgres database and RabbitMQ — with this simple approach, you don't need to do anything else.
Best practice 6: Use Respawn library for database clean up
Let's explore an integration test that tests if a shipment is created when received a valid POST request:
[Collection("ShippingTests")]

public class CreateShipmentTests(CustomWebApplicationFactory factory) : IAsyncLifetime

{

    public Task InitializeAsync() => Task.CompletedTask;


    public async Task DisposeAsync() => Task.CompletedTask;


    [Fact]

    public async Task CreateShipment_ShouldSucceed_WhenRequestIsValid()

    {

        // Arrange

        var address = new Address("Amazing st. 5", "New York", "127675");

        List<ShipmentItem> items = [ new("Samsung Electronics", 1) ];

        var request = new CreateShipmentRequest("12345", address, "Modern Shipping", "test@mail.com", items);


        // Act

        var httpResponse = await factory.HttpClient.PostAsJsonAsync("/api/shipments", request);

        var shipmentResponse = await httpResponse.Content.ReadFromJsonAsync<CreateShipmentResponse>();


        // Assert

        var expectedResponse = new ShipmentResponse(shipmentResponse.Number,"12345",

            address, "Modern Shipping", "test@mail.com", ShipmentStatus.Created, items);

         shipmentResponse

             .Should()

             .BeEquivalentTo(expectedResponse);

    }

}
After running this test, you will have a one shipment inserted in your database. When running other tests, this shipment might be a reason for other tests failure. That's why you need to clean up the database after each test, to make sure it doesn't impact other tests.
Here are the popular approaches to perform a database clean up:
- call the delete webapi endpoint.
- delete all the data from the EF Core DbContext's DataSets.
I don't like either of them.
The first approach can work in simple scenarios, but sooner or later you will run into the issue that you don't have an endpoint that deletes all the related data. And you can't create such an endpoint for security or other reasons. Simply, it may be very time-consuming.
The second approach can involve an extra work to do, and not all the projects use EF Core, or they even use multiple databases and ORMs.
So, I want to show you another approach that I find more robust and easier to use: Respawn library. As stated on the library's Github:
Respawn examines the SQL metadata intelligently to build a deterministic order of tables to delete based on foreign key relationships between tables. It navigates these relationships to build a DELETE script starting with the tables with no relationships and moving inwards until all tables are accounted for.
This library integrates with WebApplicationFactory and Testcontainers with ease. First, install the following Nuget package:
<PackageReference Include="Respawn" Version="6.2.1" />
Next, you need to update your WebApplicationFactory:
public class CustomWebApplicationFactory : WebApplicationFactory<IApiMarker>, IAsyncLifetime

{

    // Containers set up ...


    private DbConnection _dbConnection = null!;

    private Respawner _respawner = null!;

    public HttpClient HttpClient { get; private set; } = null!;


    public async Task InitializeAsync()

    {

        await _dbContainer.StartAsync();

        await _rabbitMqContainer.StartAsync();


        _dbConnection = new NpgsqlConnection(_dbContainer.GetConnectionString());

        HttpClient = CreateClient();

        await _dbConnection.OpenAsync();

        await InitializeRespawnerAsync();

    }


    public new async Task DisposeAsync()

    {

        await _dbContainer.DisposeAsync();

        await _rabbitMqContainer.DisposeAsync();

        await _dbConnection.DisposeAsync();

    }


    public async Task ResetDatabaseAsync()

    {

        await _respawner.ResetAsync(_dbConnection);

    }


    protected override void ConfigureWebHost(IWebHostBuilder builder)

    {

        Environment.SetEnvironmentVariable("ConnectionStrings:Postgres", _dbContainer.GetConnectionString());

        Environment.SetEnvironmentVariable("RabbitMQConfiguration:Host", _rabbitMqContainer.GetConnectionString());

    }


    private async Task InitializeRespawnerAsync()

    {

        _respawner = await Respawner.CreateAsync(_dbConnection, new RespawnerOptions

        {

            SchemasToInclude = [ "shipping" ],

            DbAdapter = DbAdapter.Postgres

        });

    }

}
The key point in this setup is that you need to create a database connection and pass it to the Respawner class:
_dbConnection = new NpgsqlConnection(_dbContainer.GetConnectionString());

HttpClient = CreateClient();

await _dbConnection.OpenAsync();

_respawner = await Respawner.CreateAsync(_dbConnection, new RespawnerOptions

{

    SchemasToInclude = [ "shipping" ],

    DbAdapter = DbAdapter.Postgres

});
Before opening a database connection, make sure to Create an HTTP Client to make sure that your application is started:
HttpClient = CreateClient();
Finally, in your tests you need to call WebApplicationFactory.ResetDatabaseAsync in the DisposeAsync method:
[Collection("ShippingTests")]

public class CreateShipmentTests(CustomWebApplicationFactory factory) : IAsyncLifetime

{

    public Task InitializeAsync() => Task.CompletedTask;

    public async Task DisposeAsync() => await factory.ResetDatabaseAsync();

}
Simple, isn't it?
Best practice 7: Test error responses and validation
It is crucial to have a complete set of integration tests. You need to test positive scenarios and all the possible failures.
It is important to test for failures:
- to make sure your application behaves as expected and meets the business requirements
- to make sure that test fails if you accidentally change the status code or error response format
The second point is essential: if you change the status code or error response format, you can break the clients that use the webapi. Often, especially in production, you are not allowed to introduce breaking changes into an existing API. If such test fails, you can either revert the accidental change or if your changes are intentional — you can introduce a new version of API.
You only need to test for those HTTP codes that you explicitly return from your webapi endpoints.
The "Create Shipment" use case can return 3 HTTP codes:
- 200 OK (shipment successfully created)
- 400 Bad Request (validation error)
- 409 Conflict (shipment for order is already created)
For example, in this endpoint, you don't need to test for code 500 Internal Server Error as the use case doesn't explicitly return it.
[Fact]

public async Task CreateShipment_ShouldReturnConflict_WhenShipmentForOrderIsAlreadyCreated()

{

    // Arrange

    var address = new Address("Amazing st. 5", "New York", "127675");

    List<ShipmentItem> items = [ new("Samsung Electronics", 1) ];

    var request = new CreateShipmentRequest("12345", address, "Modern Shipping", "test@mail.com", items);


    // Act

    await factory.HttpClient.PostAsJsonAsync("/api/shipments", request);

    var httpResponse = await factory.HttpClient.PostAsJsonAsync("/api/shipments", request);

    var validationResult = await httpResponse.Content.ReadFromJsonAsync<ValidationProblemDetails>();


    // Assert

    httpResponse.StatusCode.Should().Be(HttpStatusCode.Conflict);

    validationResult?.Errors.Should().HaveCount(1);

    var error = validationResult?.Errors.FirstOrDefault();

    error?.Key.Should().Be("Shipment for order '12345' is already created");

    error?.Value.First().Should().Be("A conflict error has occurred.");

}
Best practice 8: Duplicate Request and Response models in the test project
While writing integration tests, I recommend you duplicating all the tested request and response models and placing them in your test project.
Let me explain why this is essential by showcasing an example where the same request and response models from the webapi endpoints are used inside your tests.
Let's consider the "Create Shipment" use case that accepts CreateShipmentRequest and returns ShipmentResponse. Let's assume that we were doing refactoring and renamed ShipmentResponse.Number property to ShipmentNumber:
public sealed record ShipmentResponse(

    string Number, // Renamed this property

    string OrderId,

    Address Address,

    string Carrier,

    string ReceiverEmail,

    ShipmentStatus Status,

    List<ShipmentItem> Items);


public sealed record ShipmentResponse(

    string ShipmentNumber, // Renamed this property

    string OrderId,

    Address Address,

    string Carrier,

    string ReceiverEmail,

    ShipmentStatus Status,

    List<ShipmentItem> Items);
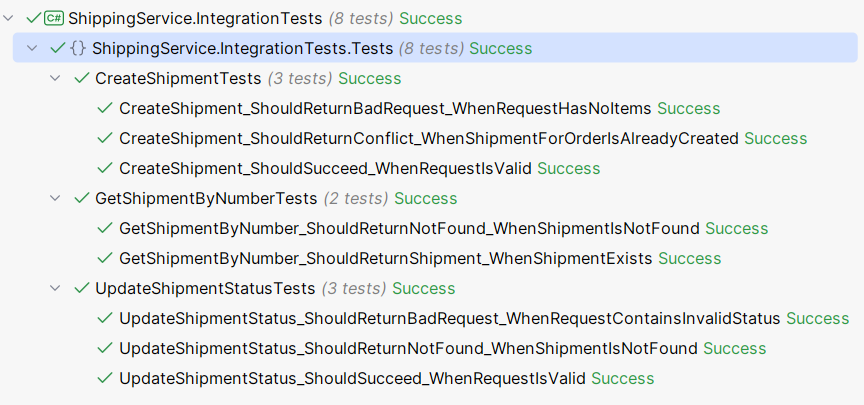
After running the tests, we will see all of them successfully passing:
Despite having this check in the tests:
var expectedResponse = new ShipmentResponse(shipmentResponse.Number,"12345",

    address, "Modern Shipping", "test@mail.com", ShipmentStatus.Created, items);


shipmentResponse

    .Should()

    .BeEquivalentTo(expectedResponse);
All because we used in our tests the same models from the actual application.
Such a passing test can lead to a very serious problem — you can break the clients that use your webapi. As we already mentioned in the Best Practise #7, you might not be allowed to change the existing API in the production environment.
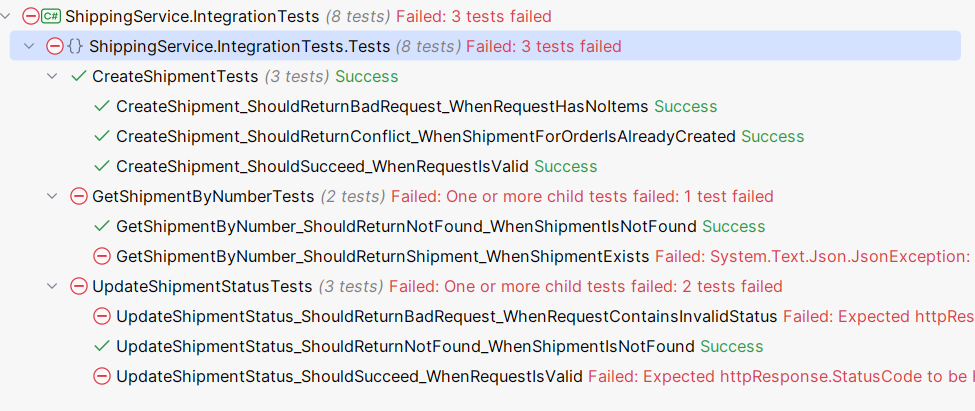
So instead, we are going to copy-paste the webapi request and response models into our test project and leave the ShipmentResponse.Number property unchanged. After we re-run the tests, we can see that tests start failing:
If the tests fail, you can either revert the accidental change or if your changes are intentional — you can update the tests or introduce a new version of API.
Best practice 9: Test asynchronous communication
Asynchronous communication plays a crucial role in modern distributed systems and microservices architectures. Testing asynchronous communication, such as event publication and consumption, in integration tests is essential for several reasons:
- Ensuring message delivery: asynchronous communication relies on messaging systems (like RabbitMQ) to deliver events between services. Testing ensures that messages are correctly published and consumed, verifying that the messaging infrastructure works as expected.
- Verifying event contracts: events act as contracts between services. Testing ensures that the published events conform to the expected schema and data, and that consumers handle these events correctly. This helps maintain consistency and prevents contract violations.
- Detecting integration issues early: asynchronous messaging can introduce complexities such as message ordering, duplication, and delivery guarantees. Integration tests can detect these issues early, reducing the risk of bugs in production.
In integration tests, we are testing one particular application that integrates with other services.
We don't need to run other services, for example, in Docker, to test integration with each other, either with synchronous or asynchronous communication (events). If we decide to do so - these are another kind of tests, named End-To-End (E2E) tests. In E2E tests, we test an entire set of services that work together as a whole.
In integration tests, it is sufficient to test if our service is publishing and consuming events of a given schema. In tests, we can subscribe to the same event we were publishing, to test if it conforms to an expected schema.
In the ShippingService the "Create Shipment" use cases published a ShipmentCreatedEvent. Let's explore how to test this event.
Integration testing of events publication and consumption is straightforward with MassTransit.
First, you need to create an empty event consumers in the test project for each event we will be testing:
public class ShipmentCreatedConsumer : IConsumer<ShipmentCreatedEvent>

{

    public Task Consume(ConsumeContext<ShipmentCreatedEvent> context)

    {

        return Task.CompletedTask;

    }

}
Second, you need to ConfigureTestServices with AddMassTransitTestHarness and add the test event consumers:
protected override void ConfigureWebHost(IWebHostBuilder builder)

{

    Environment.SetEnvironmentVariable("ConnectionStrings:Postgres", _dbContainer.GetConnectionString());

    Environment.SetEnvironmentVariable("RabbitMQConfiguration:Host", _rabbitMqContainer.GetConnectionString());


    builder.ConfigureTestServices(services =>

    {

        services.AddMassTransitTestHarness(x =>

        {

            x.AddConsumer<ShipmentCreatedConsumer>();

            x.UsingRabbitMq((context, cfg) =>

            {

                cfg.Host(new Uri(_rabbitMqContainer.GetConnectionString()), h =>

                {

                    h.Username("guest");

                    h.Password("guest");

                });


                cfg.ConfigureEndpoints(context);

            });

        });

    });

}
Notice, that we are setting AddMassTransitTestHarness with RabbitMQ, we are testing events in the real message queue that runs in Docker with TestContainers.
Now we can create a test for the "Create Shipment" use case that checks whether a ShipmentCreatedEvent was published with a correct schema. You need to start the MassTransitTestHarness before sending an HTTP request to the webapi:
var massTransitHarness = factory.Services.GetTestHarness();

await massTransitHarness.Start();
After sending an HTTP request, you can test if an event was published and consumed. MassTransitHarness has a ready API to test events:
var isEventPublished = await massTransitHarness.Published.Any<ShipmentCreatedEvent>();

isEventPublished.Should().BeTrue();


var consumerHarness = massTransitHarness.GetConsumerHarness<ShipmentCreatedConsumer>();

var isEventConsumed = await consumerHarness.Consumed.Any<ShipmentCreatedEvent>(x =>

{

    var message = x.Context.Message;


    return message.OrderId == shipmentResponse.OrderId &&

           message.Number == shipmentResponse.Number &&

           message.Carrier == shipmentResponse.Carrier &&

           message.ReceiverEmail == shipmentResponse.ReceiverEmail &&

           message.Status == Shared.Models.ShipmentStatus.Created &&

           message.Address.City == shipmentResponse.Address.City &&

           message.Address.Street == shipmentResponse.Address.Street &&

           message.Address.Zip == shipmentResponse.Address.Zip;

});
Here we are testing that ShipmentCreatedEvent is published and consumed with a correct schema.
"IMPORTANT NOTE: you can't check if an event is not published in MassTransitHarness; if try to test it - your test will freeze."
Summary
These best practices represent the culmination of over a decade of my coding experience. These practises help me writing reliable, robust and efficient integration tests.
By incorporating these techniques, you can significantly enhance the quality of your ASP.NET Core applications and integration tests. I hope you find these insights valuable for your development journey.
If you know other best practises - make sure to share them with me via Email or LinkedIn, which you can find in the footer of my website.
Hope you find this blog post useful. Happy coding!
You can download source code for this blog post for free:
Download source code