In this article, let’s learn about how to perform file upload in ASP.NET Core 6. The file for upload can be of any format like image (jpg, BMP, gif, etc), text file, XML file, CSV file, PDF file, etc. We will learn how to design a web page that allows users to select a file for upload and then by the click of a button submit the same web page to upload a file on the webserver.
Table of contents
- Overview
- File upload approaches
- Buffering
- Streaming
- Implement file upload in ASP.NET Core
- Overall approach
- Create ASP.NET Core project for demonstration
- Upload small file with buffered model binding
- Add service
- Add controller
- Add view
- What is multipart/form-data?
- Run & Test the code
- Upload large file with streaming
- Add service
- Add controller
- Add view
- Run & Test the Code
- File storage options
- Security considerations
- Summary
- Download source code
Overview
File upload in an application is a feature using which users can upload a file that is present on the user’s local system or network to the web application. The web application takes the file to process then if required it will perform some validations on the file and finally will store this file in the storage configured in the system for saving files i.e. either in local storage, shared remote storage or database, etc. based on the requirements.
File upload is an important feature that can be used to upload a user’s Profile picture, client KYC details like photo, signature & other supporting documents. File uploads can also be used to upload data where instead of submitting a single record at a time users can submit a list of records together using a CSV or XML file formats.
In this article, the main focus will be on how we can implement file upload in ASP.NET Core MVC. The IFormFile interface is part of Microsoft.AspNetCore.Http namespace can be used to upload one or more files in ASP.NET Core. ASP.NET Core supports file upload using buffered model binding for smaller files and unbuffered streaming for large files.
File upload approaches
There are two approaches available to perform file upload in ASP.NET Core.
Buffering
In this approach, IFormFile which is a C# representation of the file is used to transfer, process & save a file on the webserver. The entire file is read into an IFormFile object so the requirement for disk and memory on the server will depend on the number and size of the concurrent file uploads.
Any single file being uploaded if greater than 64KB then the file is moved from the memory to the temp file on the disk. If an application or web server resources are being exhausted due to large file size and too many concurrent file uploads then one should consider using the streaming approach in that case.
Streaming
In this approach, the file is uploaded in a multipart request and directly processed or saved by the application. For uploading file streaming approach consumes less memory or disk space as compared to the buffering approach. Streaming should be the preferred approach when uploading larger files on the webserver.
Implement file upload in ASP.NET Core
For the purpose of development of the demonstration application, we will make use of Visual Studio Community 2022 Version 17.2.1 with .NET 6.0 SDK.
Overall approach
For the demonstration of how to perform file upload in ASP.NET Core, we will take the following approach:
- We will first create an application of the type ASP.NET Core MVC and name it as ProCodeGuide.Samples.FileUpload.
- We will implement both types of file uploads i.e. Buffered model binding for small files and Streaming for large files.
- We will add the required controller with the required ViewModel that takes the file as input and saves it to the local folder.
- We will add the view using which the user is able to select the file from the local file system for upload and submit the file to the controller action method.
- Finally, we will run the application and test the feature file upload in ASP.NET Core.
Create ASP.NET Core project for demonstration
Create a new project of type ASP.NET Core MVC as per the screenshots shown below with the name of the project as ProCodeGuide.Samples.FileUpload

We will be using this project to demonstrate both types i.e. buffered and streaming to perform file upload in ASP.NET Core.
Upload small file with buffered model binding
Here we will see how to upload a small file using buffered model binding. Here to perform file upload in ASP.NET Core we will be using a buffered model binding approach that is simple to implement and can be used to upload small files.
Add service
We will add a service that will take an IFormFile as input and save the file submitted to a folder named UploadedFile under the path environment current directory. This service will be used in the controller to save the file posted as buffered model binding.
We will add the below code for the interface under Interfaces/IBufferedFileUploadService.cs
public interface IBufferedFileUploadService

{

    Task<bool> UploadFile(IFormFile file);

}
We will add the below code for the service under Services/BufferedFileUploadLocalService.cs
public class BufferedFileUploadLocalService : IBufferedFileUploadService

{

    public async Task<bool> UploadFile(IFormFile file)

    {

        string path = "";

        try

        {

            if (file.Length > 0)

            {

                path = Path.GetFullPath(Path.Combine(Environment.CurrentDirectory, "UploadedFiles"));

                if (!Directory.Exists(path))

                {

                    Directory.CreateDirectory(path);

                }

                using (var fileStream = new FileStream(Path.Combine(path, file.FileName), FileMode.Create))

                {

                    await file.CopyToAsync(fileStream);

                }

                return true;

            }

            else

            {

                return false;

            }

        }

        catch (Exception ex)

        {

            throw new Exception("File Copy Failed", ex);

        }

    }

}
In the above code in the service:
- The uploaded file is accessed through model binding using IFormFile.
- The Path.GetFullPath is used to get the fully qualified path to save the uploaded file.
- The Directory.CreateDirectory is used to create the full qualified path if it does not exist.
- The contents of the file in the IFormFile are accessed using the Stream.
- The path along with the file name is passed to the File Stream. If the filename is not specified then it will throw an exception.
- Saves the files to the file system on the specified path using the file name as provided by IFormFile. (this has been done to keep code. simple else you should generate a new file name and not use the file name specified by the user).
Now that we have added the service we will register this service in the dependency container so that it can be injected into the controller using the constructor. To register the service in the dependency container we will add the below line of code in the Program.cs file.
builder.Services.AddTransient<IBufferedFileUploadService, BufferedFileUploadLocalService>();
Add controller
Now let’s add the MVC controller for buffered file upload that will implement the get action to display the view and post-action to handle the file upload in ASP.NET Core.
We will add a controller under Controllers\BufferedFileUploadController.cs as per the code shown below:
public class BufferedFileUploadController : Controller

{

    readonly IBufferedFileUploadService _bufferedFileUploadService;


    public BufferedFileUploadController(IBufferedFileUploadService bufferedFileUploadService)

    {

        _bufferedFileUploadService = bufferedFileUploadService;

    }


    public IActionResult Index()

    {

        return View();

    }


    [HttpPost]

    public async Task<ActionResult> Index(IFormFile file)

    {

        try

        {

            if (await _bufferedFileUploadService.UploadFile(file))

            {

                ViewBag.Message = "File Upload Successful";

            }

            else

            {

                ViewBag.Message = "File Upload Failed";

            }

        }

        catch (Exception ex)

        {

            // Log ex

            ViewBag.Message = "File Upload Failed";

        }

        return View();

    }

}
In the above controller, we have injected the BufferedFileUploadService through the constructor using dependency injection.
The above post-action takes file input as IFormFile and files uploaded using IFormFile are buffered in the memory or disk on the server before processing the file in the controller or service.
Add view
We will add the view to allow the user to select the file for upload and submit the same to the server. We will add a view under Views\BufferedFileUpload\Index.cshtml as per the code shown below:
<h1>Buffered File Upload</h1>

<hr />

<form method="post" enctype="multipart/form-data">

    <input type="file" name="file" />

    <button type="submit">Upload File</button>

</form>


@if (ViewBag.Message != null)

{

    <div class="alert" style="margin-top: 20px">

        @ViewBag.Message

    </div>

}
In order to perform file upload in ASP.NET Core, HTML forms must specify an encoding type (enctype) as multipart/form-data.
To make the input element to upload the file you need to specify the input type as ‘file’.
What is multipart/form-data?
The multipart/form-data is nothing but one of the content-type headers of the post method. This content type is mainly used to send the files as part of the request. When this content type is used it means that each value is sent as a block of data.
Run & Test the code
Finally after adding all the required code compile & execute the code. After execution navigate to path /BufferedFileUpload/Index and it should display the screen shown below.
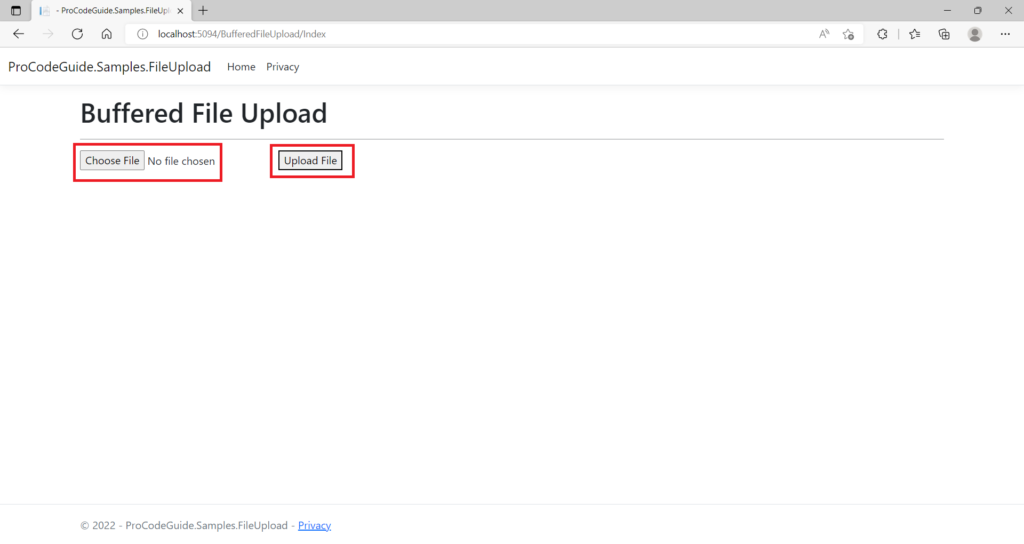
On the above screen, you can select the file to be uploaded and then click on the Upload File button to perform file upload in ASP.NET Core. On successful submission, you should be able to see the file on the server under the folder UploadedFiles.
Upload large file with streaming
Here we will see how to upload large files using Streaming. Here to perform file upload in ASP.NET Core we will be using a streaming approach that can be used to upload larger files.
Add service
We will add a service that will read the file input as a stream and save the file submitted to a folder named UploadedFile under the path environment current directory. This service will be used in the controller to save the file posted as a stream.
We will add the below code for the interface under Interfaces/IStreamFileUploadService.cs
public interface IStreamFileUploadService

{

    Task<bool> UploadFile(MultipartReader reader, MultipartSection section);

}
We will add the below code for the service under Services/StreamFileUploadLocalService.cs
public class StreamFileUploadLocalService : IStreamFileUploadService

{

    public async Task<bool> UploadFile(MultipartReader reader,MultipartSection? section)

    {

        while (section != null)

        {

            var hasContentDispositionHeader = ContentDispositionHeaderValue.TryParse(

                section.ContentDisposition, out var contentDisposition

            );


            if (hasContentDispositionHeader)

            {

                if (contentDisposition.DispositionType.Equals("form-data") &&

                (!string.IsNullOrEmpty(contentDisposition.FileName.Value) ||

                !string.IsNullOrEmpty(contentDisposition.FileNameStar.Value)))

                {

                    string filePath = Path.GetFullPath(Path.Combine(Environment.CurrentDirectory, "UploadedFiles"));

                    byte[] fileArray;

                    using (var memoryStream = new MemoryStream())

                    {

                        await section.Body.CopyToAsync(memoryStream);

                        fileArray = memoryStream.ToArray();

                    }

                    using (var fileStream = System.IO.File.Create(Path.Combine(filePath, contentDisposition.FileName.Value)))

                    {

                        await fileStream.WriteAsync(fileArray);

                    }

                }

            }

            section = await reader.ReadNextSectionAsync();

        }

        return true;

    }

}
In this model binding doesn’t read the form, parameters that are bound from the form don’t bind. The post-action method works directly with the Request property. A MultipartReader is used to read each section.
Now that we have added the service we will register this service in the dependency container so that it can be injected into the controller using the constructor. To register the service in the dependency container we will add the below line of code in the Program.cs file.
builder.Services.AddTransient<IStreamFileUploadService, StreamFileUploadLocalService>();
Add controller
Now let’s add the MVC controller for stream file upload that will implement the get action to display the view and post-action to handle the file upload in ASP.NET Core.
We will add a controller under Controllers\StreamFileUploadController.cs as per the code shown below:
public class StreamFileUploadController : Controller

{

    readonly IStreamFileUploadService _streamFileUploadService;


    public StreamFileUploadController(IStreamFileUploadService streamFileUploadService)

    {

        _streamFileUploadService = streamFileUploadService;

    }


    [HttpGet]

    public IActionResult Index()

    {

        return View();

    }


    [ActionName("Index")]

    [HttpPost]

    public async Task<IActionResult> SaveFileToPhysicalFolder()

    {

        var boundary = HeaderUtilities.RemoveQuotes(

            MediaTypeHeaderValue.Parse(Request.ContentType).Boundary

        ).Value;

        var reader = new MultipartReader(boundary, Request.Body);

        var section = await reader.ReadNextSectionAsync();

        string response = string.Empty;

        try

        {

            if (await _streamFileUploadService.UploadFile(reader, section))

            {

                ViewBag.Message = "File Upload Successful";

            }

            else

            {

                ViewBag.Message = "File Upload Failed";

            }

        }

        catch (Exception ex)

        {

            // Log ex

            ViewBag.Message = "File Upload Failed";

        }

        return View();

    }

}
In the above controller, we have injected the StreamFileUploadService through the constructor using dependency injection.
The above post-action reads file input from stream and files uploaded using stream are not buffered in the memory or disk on the server before processing the file in the controller or service. The file input from the stream can be read only once.
The reader object of type Microsoft.AspNetCore.WebUtilities.MultipartReader is created to read a stream of subparts from the multipart data.
Add view
We will add the view to allow the user to select the file for upload and submit the same to the server. We will add a view under Views\StreamFileUpload\Index.cshtml as per the code shown below:
<h1>Stream File Upload</h1>

<hr />

<div>

    <form asp-route="StreamFileUpload/Index" enctype="multipart/form-data" method="POST">

        <input type="file" name="file" />

        <button type="submit" class="btn btn-primary">Save</button>

    </form>

</div>

@if (ViewBag.Message != null)

{

    <div class="alert" style="margin-top:20px">

        @ViewBag.Message

    </div>

}
Run & Test the code
Finally, after adding all the required services, controller and view, compile & execute the code. After execution navigate to path /StreamFileUpload/Index and it should display the screen shown below:
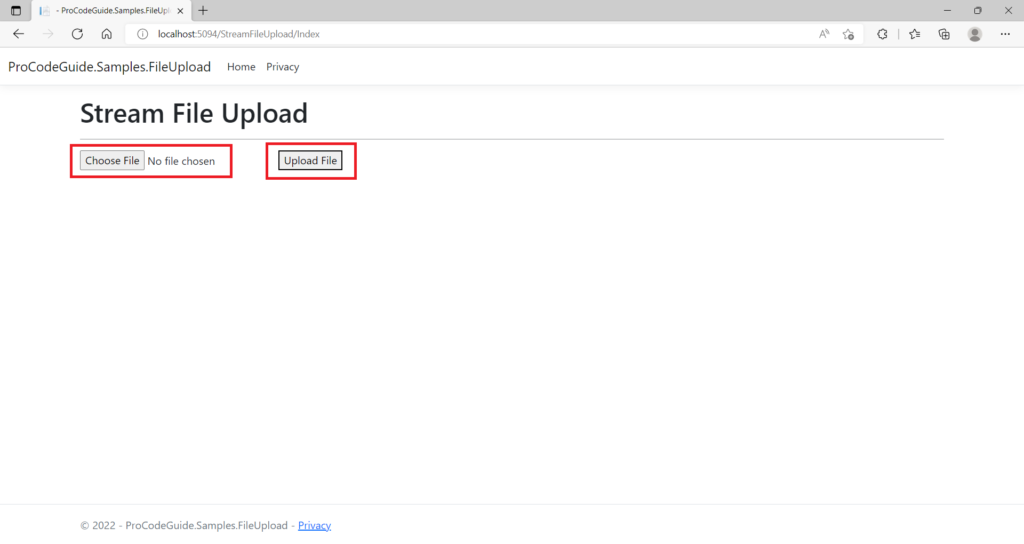
On the above screen, you can select the file to be uploaded and then click on the Upload File button to perform file upload in ASP.NET Core. On successful submission, you should be able to see the file on the server under the folder UploadedFiles.
File storage options
In our above demonstration, we save the file to a local file system. Still, there are also other options available when it comes to selecting a destination for the storage of a file on the webserver. The common storage options available for files is as follows:
- File System – In this option, the file is saved on physical storage either locally or on the network share.
- Database – In this option, the file is saved in the database table in one of the columns either as BLOB or raw data.
- Cloud – In this option, the file is saved in the cloud using some service provided by the cloud provider for file storage.
The above options are also supported for file upload in ASP.NET Core. Below are some points that should be considered while marking a choice for storage options:
- For smaller file uploads database is normally a faster option as compared to physical storage
- For larger file uploads physical storage works out to be less economical than database storage.
- A database can work out to be an efficient option for file storage as when we are selecting the record from the database we can also select the file data along with the record.
- Also when you store a file in the database then you can insert a record along with file data as part of the same database transaction else if a file is in a physical store and the record is in a database then if not designed properly it might create some inconsistency between the record and the file data.
- When you store larger files in the database then the size database grows considerably making database backups and restoration a heavy and time-consuming process.
- The database limits may put some restrictions on the maximum size of the file allowed for storage.
- In the case of physical storage, the application which is trying to save files on the physical path should have read-write permission to the storage location.
- Cloud storage often provides better stability and resiliency than compared to on-premises solutions
- Physical storage is on a general level less economical as compared to database storage and also database storage might work out to be less expensive as compared to cloud data storage service.
Security considerations
It would help if you always were cautious when you provide a feature of file upload in your application as attackers might try to exploit the application through this feature of file upload in ASP.NET Core. Attackers might try to bring down the system by uploading a file that is infected with viruses or malware or may attempt to break into the system to gain access to the o the network or servers.
Below are the measures which you should consider as these will help you to stop attackers from making a successful attempt to break down the system or break into the system:
- Put a limit on the max size of the file that can be uploaded.
- If physical storage is used the uploaded files should be copied to a non-system drive.
- Preferably copy all the upload files to a dedicated location so that it is easier to impose access rights on that location.
- When you are assigning read-write permission to the disk for copying uploaded files do ensure that you don’t end up granting execute permissions.
- You should copy the uploaded files to a directory that is different from the directory in which the application is deployed.
- In the first place don’t allow a user to decide the file name of the file being uploaded or if the user is allowed to select a file name then ensure you have all the validation for the file in place so that undesired keywords or characters are avoided.
- Also, validate the file extensions so that only the allowed file types are permitted for upload.
- Perform a check for virus\maclware on all the files being uploaded. For this, you can use a third-party API for virus/malware scanning on the uploaded content.
- Ensure that apart from client-side validations you also perform all the validation on the file at the server side also.
Summary
We learned about how to perform file upload in ASP.NET Core Application for buffered & stream types. The buffered approach is preferable in scenarios where the file size is smaller and the number of concurrent file submissions is also less.
The stream approach should be used where we are submitting large files or also the number of concurrent file submissions is on the higher side. The stream type will help to reduce the requirement for memory & disk on the server.
References
– File Upload in ASP.NET Core
Download source code
Here you can download the complete source code for this article demonstrating how to perform file upload in ASP.NET Core Application.
https://github.com/procodeguide/ProCodeGuide.Samples.FileUpload