In some scenarios, we need to use different database providers for development and production environments. For instance, consider a scenario where we use SQLite in the development environment and SQL Server for the production environment.
This article will guide us through creating migrations for multiple database providers in Entity Framework.
Install Entity Framework packages
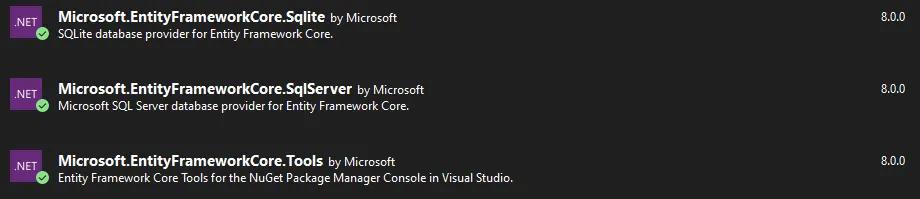
The first step is to ensure we have all the necessary packages installed. We’ll be focusing on utilising both SQLite and SQL Server providers. We need to install specific packages from the NuGet package library:
- Microsoft.EntityFrameworkCore.SqlServer
- Microsoft.EntityFrameworkCore.Sqlite
- Microsoft.EntityFrameworkCore.Tools
Creating a model class
The next step is creating a model class as a blueprint for a database table. For demonstration purposes, we will create a Person class. This class will be mapped to a corresponding Person table in the database.
public class Person

{

    public Guid Id { get; set; }

    public string? FirstName { get; set; }

    public string? LastName { get; set; }

    public DateOnly BirthDate { get; set; }

}
Creating Data Context
Initially, we start by constructing a base DataContext. This class serves as a repository for the DbSet properties corresponding to each of our models.
public class DataContext : DbContext

{

    public DbSet<Person> Person { get; set; }


    // Other properties...

}
Next, our task is to create a dedicated data context class for each database provider, which inherits from the base DataContext class.
Data Context for Sqlite:
public class SqliteDataContext(IConfiguration configuration) : DataContext

{

    private readonly IConfiguration _configuration = configuration;


    protected override void OnConfiguring(DbContextOptionsBuilder optionsBuilder)

    {

        optionsBuilder.UseSqlite(_configuration.GetConnectionString("Sqlite"));

    }

}
Data Context for Sql Server:
public class SqlServerDataContext(IConfiguration configuration) : DataContext

{

    private readonly IConfiguration _configuration = configuration;


    protected override void OnConfiguring(DbContextOptionsBuilder optionsBuilder)

    {

        optionsBuilder.UseSqlServer(_configuration.GetConnectionString("SqlServer"));

    }

}
In each database-specific data context class, we need to inject the IConfiguration. This lets us easily get the connection string for the particular database we’re working with.
Then, we override the OnConfiguring method. This method sets up which database provider to use and provides the connection string. We get this connection string from IConfiguration. This setup ensures each database has the correct settings to connect and work properly with our application.
Configure connection strings
We need to set up the connection strings for each database provider. This is easily done in the appsettings.json file of our application.
{

  "ConnectionStrings": {

    "Provider": "Sqlite",

    "SqlServer": "Data Source=localhost;Initial Catalog=EFMultipleMigration;Integrated Security=True",

    "Sqlite": "Data Source=EFMultipleMigration.db"

  }

}
Next, we need to register the data context in our application based on the provider we have configured in the appsettings.json file. To do this, go to the Program.cs file and add the code below:
switch (builder.Configuration.GetConnectionString("Provider"))

{

    case "SqlServer":

        builder.Services.AddDbContext<DataContext, SqlServerDataContext>();

        break;

    case "Sqlite":

        builder.Services.AddDbContext<DataContext, SqliteDataContext>();

        break;

}
The code above checks the “Provider” value in the appsettings.json configuration and then decides whether to use the SqlServerDataContext or SqliteDataContext.
- If the provider is “SqlServer”, it uses
SqlServerDataContext.
- If it’s “Sqlite”, it uses
SqliteDataContext.
Creating the Migrations
Now, let’s add migrations for each database provider. Open the Package Manager Console and use the following commands.
First, we create an initial migration for Sqlite:
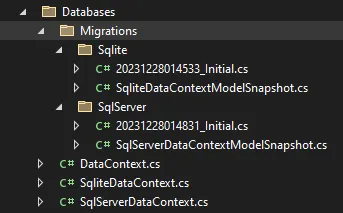
Add-Migration Initial -Context SqliteDataContext -OutputDir Databases/Migrations/Sqlite
The command above will generate an ‘Initial’ migration for SQLite. This migration will be placed in the ‘Databases/Migrations/Sqlite’ directory.
We can run the command below to add the Initial migration for SQL Server:
Add-Migration Initial -Context SqlServerDataContext -OutputDir Databases/Migrations/SqlServer
Run the Migration
To run the migration manually, we can execute the command below:
Update-Database -Context SqliteDataContext
The command above will perform the migration for the SQLite database.
We can change the Context value to SqlServerDataContext to run the SQL Server migrations:
Update-Database -Context SqlServerDataContext
We can also add the following code to the Program.cs file to run the migration automatically every time the application starts:
var scope = app.Services.CreateScope();

var dataContext = scope.ServiceProvider.GetRequiredService<DataContext>();

dataContext.Database.Migrate();
• • •
The complete source code of this article can be found here:
• GitHub - juldhais/EFMultipleMigration: Entity Framework Multiple Migration Example
Thank you for reading. 👍