Unit testing is one of the major parts of software testing which can be handled by the developer itself. It is used to test the smallest components of your code. The purpose of the Unit test is to validate the functionality or expected output of your code during your development phases.

It helps every developer to test the code before pushing it to source control. There are several unit testing frameworks available in the market like xUnit, NUnit, etc.
In this article, we will be looking into how we can do unit testing of the .Net Web API project. Here we are using the xUnit framework to do the same because it is a free and open-source tool for .Net development. Here we will work on the very basic operations to start with.
Let's jump directly into the code to check how it works.
First, we will create a Web API project using .Net Core 6.0 for a very simple CRUD operation of Employee records. Let's create the project and develop the APIs.
Step 1: Open Visual Studio 2022 and click on “Create a new project”.
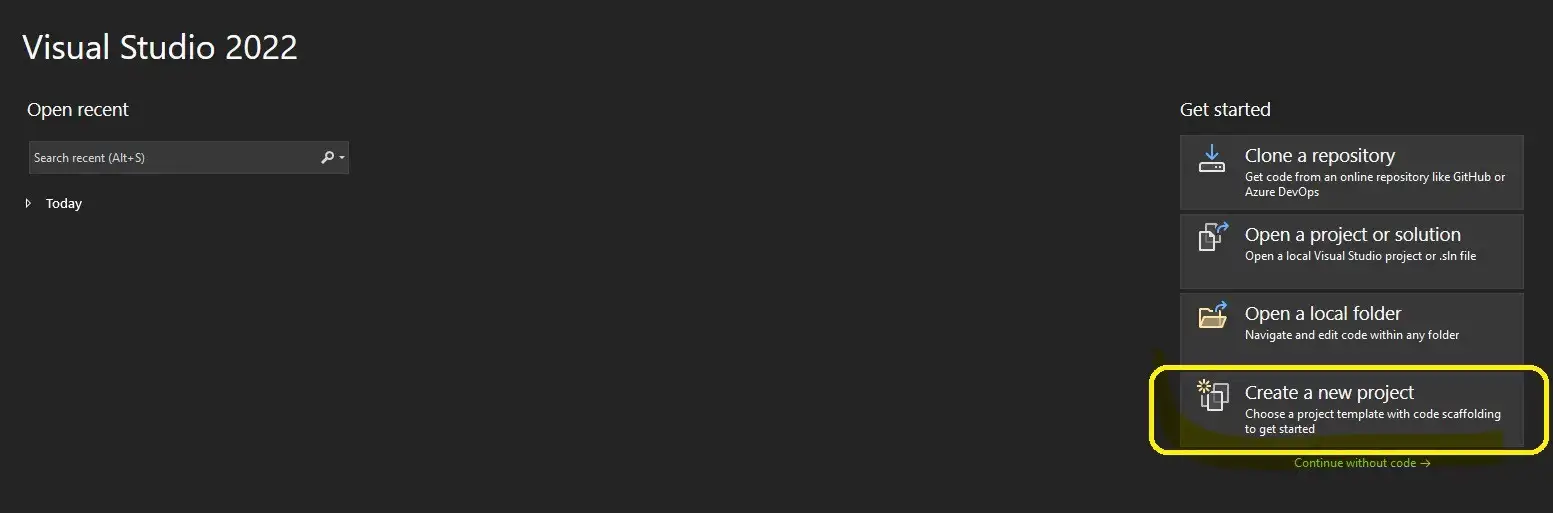
Create a new project with Visual Studio 2022
Step 2: Select the project template called “ASP.NET Core Web API” and click on Next.
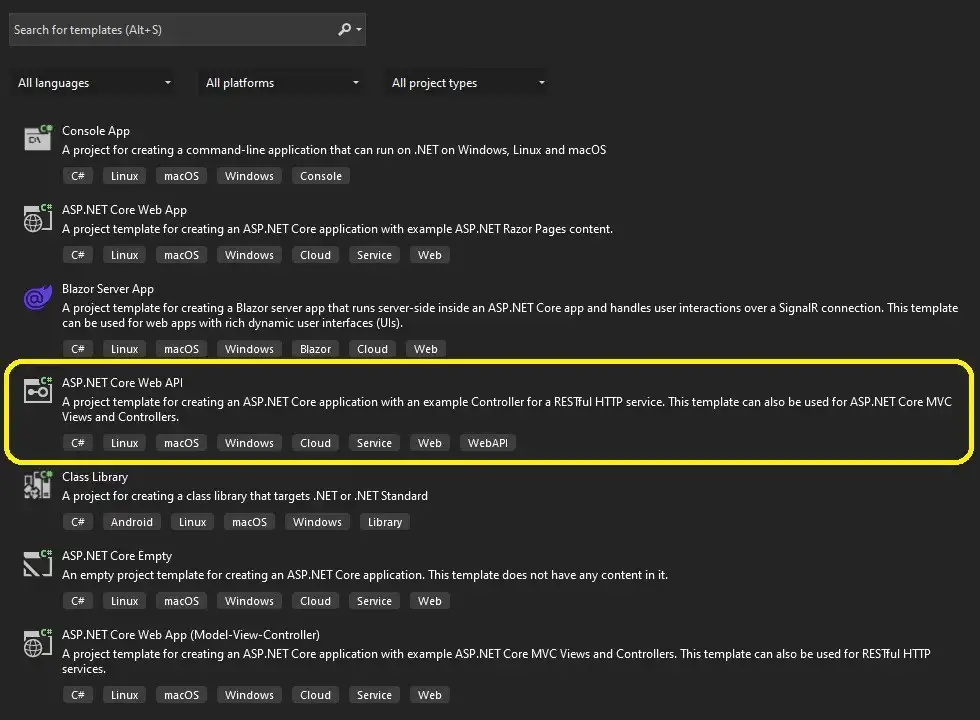
Select the project template
Step 3: Put your Project Name, Location Path, and Solution Name, and click on Next.
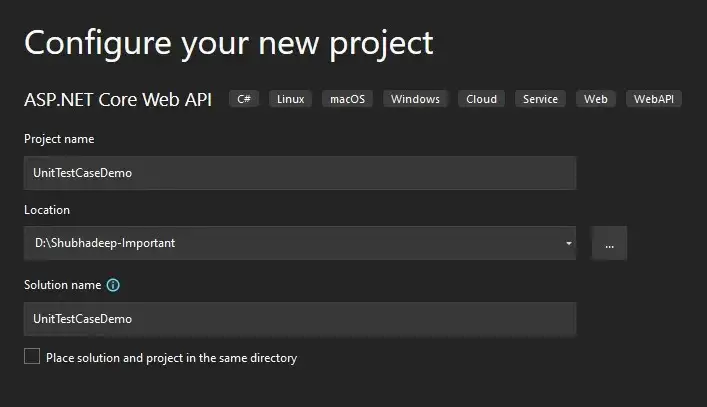
Configure the project name
Step 4: Make sure the .Net framework version is 6.0 and keep other options as default. Then click on Create to land on the Visual Studio code editor.
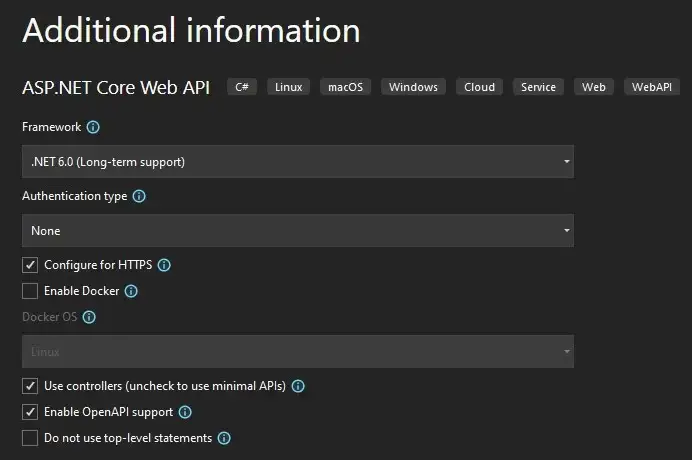
.Net Framework Configuration
Step 5: Remove the default code templates (WeatherForecastController and WeatherForecast class) from the project. Add a new folder called Model and Services in the root directory and the following files.
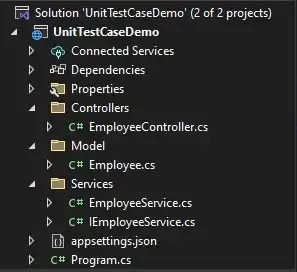
Web API Project Structure
Step 6: Adding the Employee model code with very basic properties called Employee Id, Name, Phone Number, and Email ID.
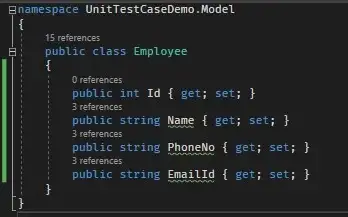
Employee Model
Step 7: Adding code to the Interface called IEmployeeService. Here we have added a very basic Create, Read, Delete operation.
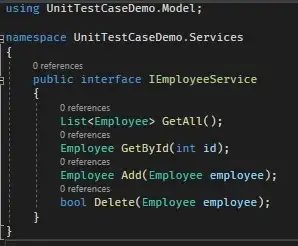
IEmployeeService Interface
Step 8: Now let’s implement the interface into the service class.
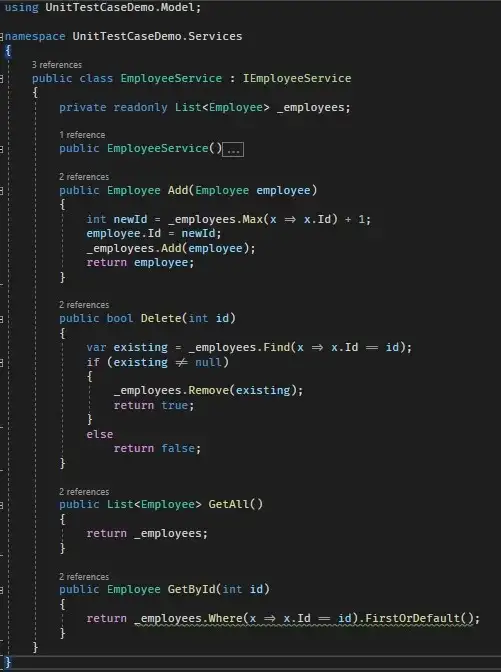
Employee Service Class
We have added all the basic functionalities to the service class. Here we can add or delete employees along with we can fetch all the employees or a specific employee.
In the constructor, we have populated some data to do the operations but in real life scenario, you may have to fetch the data from any database. Actually, that doesn’t matter as long as the concepts are the same.
Let’s have a look at our constructor code, where we have added some employee information.
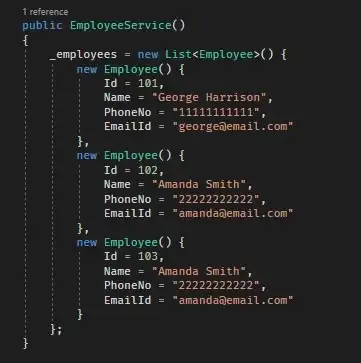
Employee Service Constructor
Step 9: Now is the time to develop our controller using our services by dependency injection.
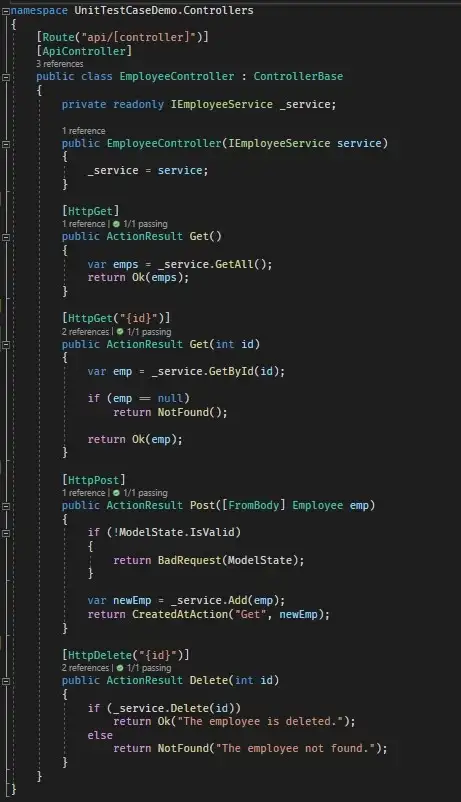
EmployeeController
Here we have added very basic code with minimal validation. Let's run the project.
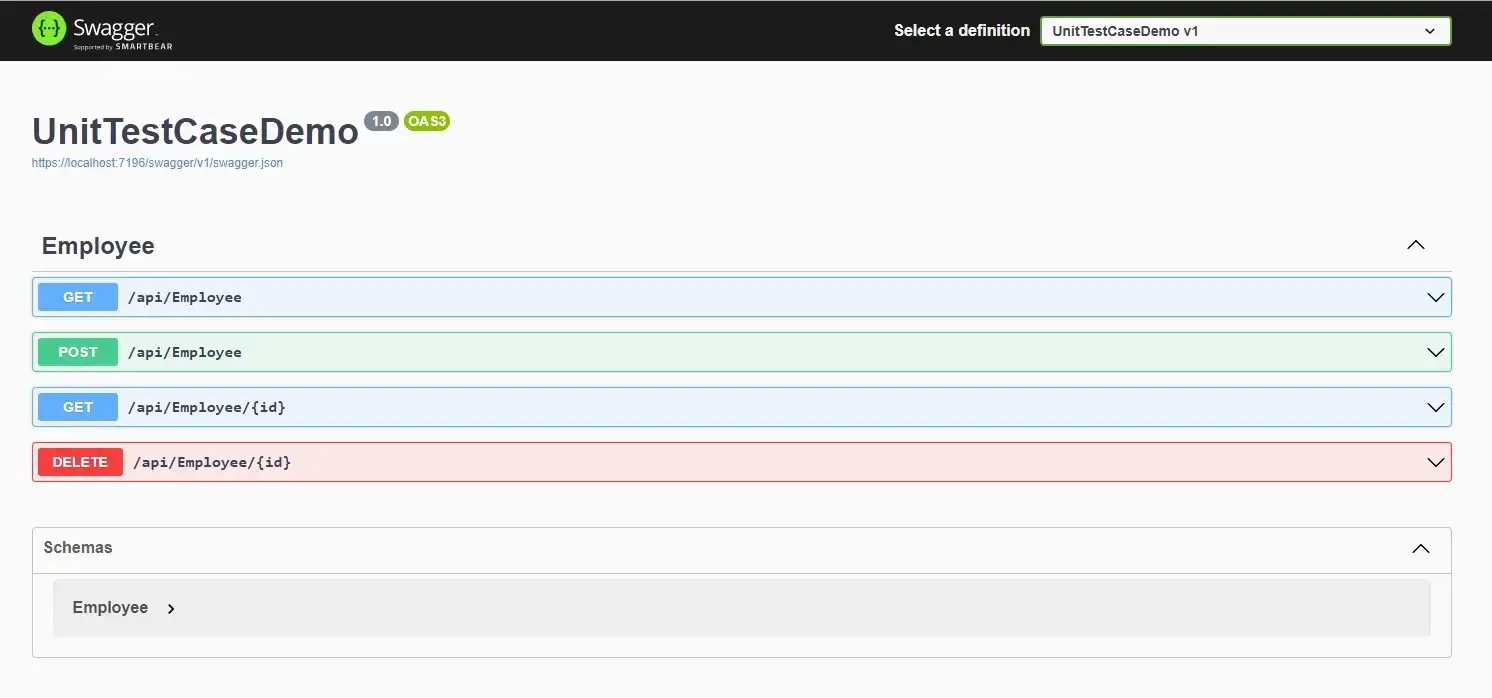
Swagger Specification
As our API Project is up and running now, we can move ahead and add the Unit test project to it.
Step 10: Let’s add a Unit Test Project. Right-click on the solution then click on Add and then New Project.
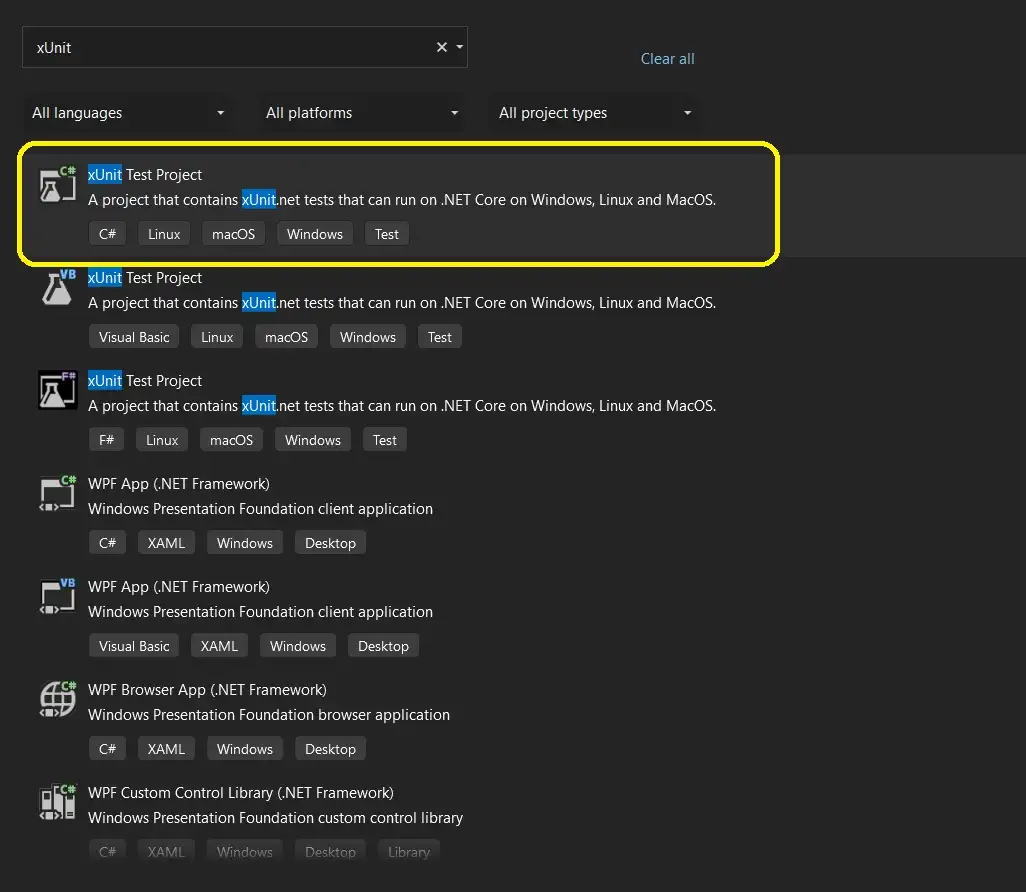
Step 11: Select the project template called xUnit Test Project and click on Next.
Test project template selection
Step 12: Name the project with UnitTestCaseDemo.Test and select the project location and click on the next.
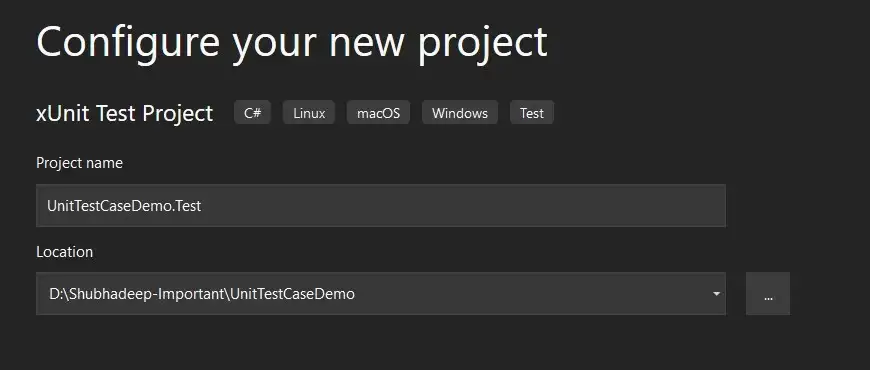
Name the Test Project
Step 13: Let’s set the .net framework version.
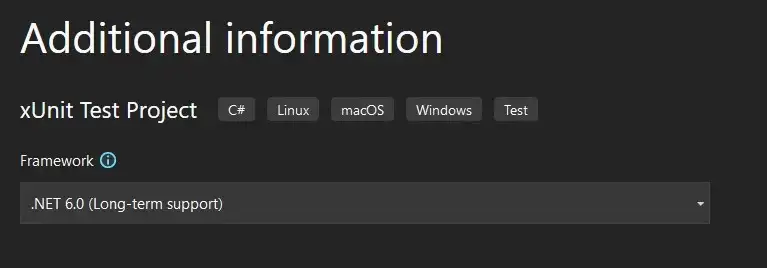
Setting up the .net framework version
Step 14: Now the test project is created and you can find it in the solution explorer now. Let’s rename the default test class to EmployeeControllerTest.cs. The project structure should be as follows:
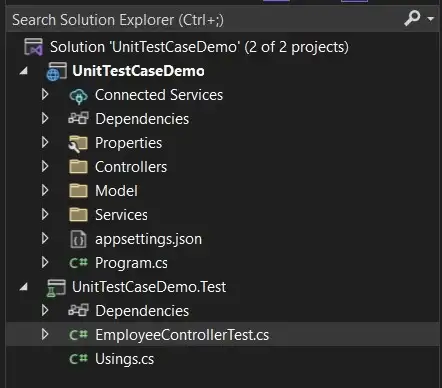
Project Structure of the Test project
Step 15: Now we need to add the reference of the project on which we will apply the test. So, right-click on the dependencies and click on the Add Project Reference.
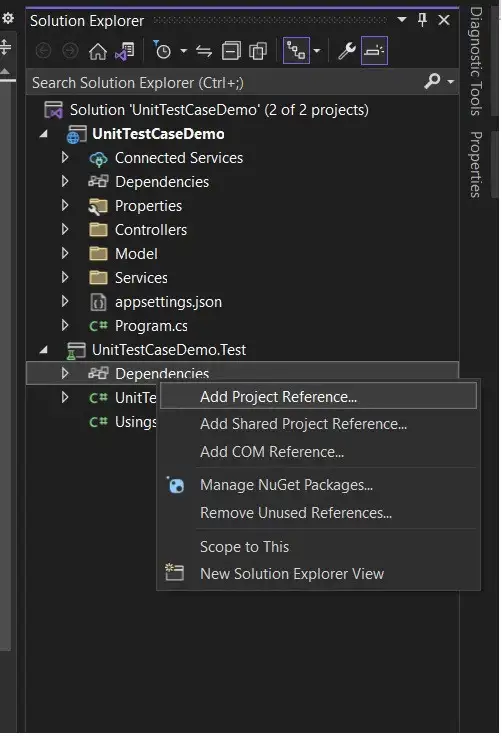
Add project reference
Step 16: Select the project called UnitTestCaseDemo and click on OK.

Set Project reference
Now we are ready to write our unit test code in EmployeeControllerTest class. Before that, we need to understand how a unit test class is structured.
• • •
A good practice for writing unit tests is to follow the Arrange-Act-Assert pattern.
Arrange: to set up the inputs to configure or declare the variables for the test.
Act: to do the actions like a method call or controller call.
Assert: to evaluate the results.
• • •
Now let’s start writing some unit tests.
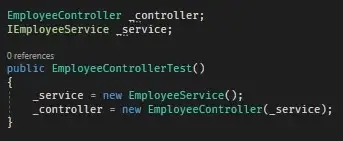
Step 17: Adding necessary using statements and creating the constructor of the test class where we need to add the controller and services.
Constructor Code
Step 18: Prepare a new test method called GetAll_Employee_Success() to test out get all employees' functionality.
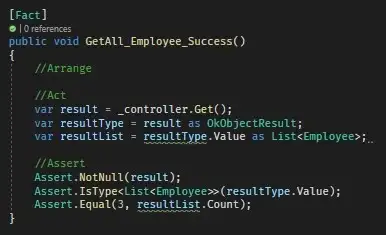
GetAll_Employee_Success
In the above code snippet, we have added a test to check whether our Get All employee method is properly working or not. So, we are going to check that the controller method should return the Ok result along with the List of Employee class. Also, we will validate the count of the records as we have a fixed number of records.
Here we have added three assert statements to check the result should not be null, it must return the List of Employee class and the count of the records must be 3.
Step 19: Let’s prepare a new test method to check whether Get by Id is working properly or not.
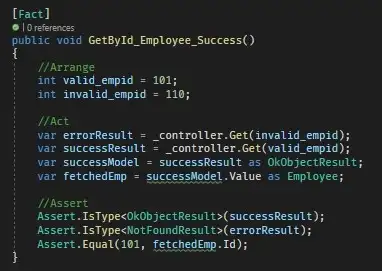
GetById_Employee_Success
In the above code, we took one valid and one invalid employee id in the arrange section. We have added code to test success and error in both scenarios. The assertion is for the result type (Success and Not Found) and the employee id.
Step 20: Add unit test code for Add Employee.
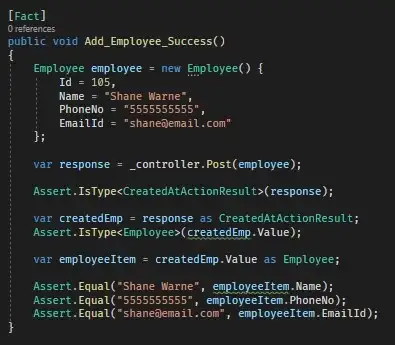
Add_Employee_Success
In the above code, we have prepared one employee object to create using the test and invoked the controller post method. Then assertion is added for the result type and value checks.
Step 21: Let’s add unit testing for Delete Employee.
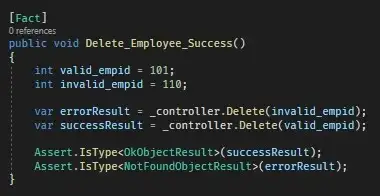
Delete_Employee_Success
In the above code we have tried two scenarios, delete employees with valid employee id and invalid employee id. For the valid employee, the expected result is success and for an invalid id, it should return a not found result.
Step 22: All the unit test case is in place, now let’s run the tests to check whether all the tests are passing or not. Just click on “Run All Tests” under the Test menu in the Menu bar.
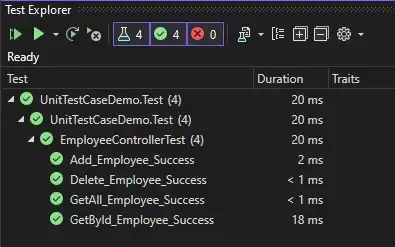
Test Explorer
In the above case, you can find that all the tests are passed. So, In case of any changes in code, we can make sure the existing functionality is not broken by executing the tests.
Again keep in mind this article is only for beginner level because in real-life cases there are a lot of test scenarios we should cover as part of the unit testing. The goal of this article is to demonstrate the concept and how to use it. So that you can use it in your projects as per your requirement.
Thanks a lot for reading this article, hope it will help you to implement the same in your projects. Let me know your feedback in the comment sections. Happy Coding.
• • •
Here is the GitHub repository used for the demo, you can clone the source code and play around with it as per your needs.