Introduction
Docker is a popular platform for building and deploying applications using containers. Containers allow you to package your application and its dependencies into a single, portable unit, making it easy to deploy and run your application on any machine with any operating system that has Docker installed on it.
You can find more information on docker on its official website.
In this tutorial, we will learn how to build and deploy .NET Core applications using Docker containers.
Pre-requisites
Before we get started, you will need to make sure that you have the following prerequisites installed on your machine.
- Docker
- .NET Core SDK
Step 1: Create a new .NET Core application
The first step is to create a .NET Core application. You can use the dotnet command-line tools to create a new .NET Core project.
Let's create a new ASP.NET Core web application. Open Command Prompt/Powershell, navigate to the folder where you want to create the project, and run the following command:
dotnet new webapp -o NetCoreWithDockerDemo
This will create a new ASP.NET Core web application in a folder called NetCoreWithDockerDemo.
Now, let's verify if the web application is created properly and if we are able to run it locally. To do this, step into the newly created folder "NetCoreWithDockerDemo" in the Command Prompt/Powershell, and run the following command:
dotnet run
This command will build the application and run it on the assigned port on localhost.
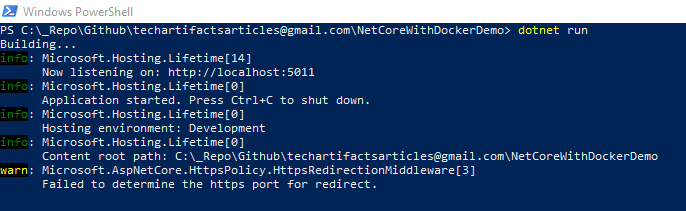
The port can change in your case. Copy the localhost address and open it in the browser. You should see the Welcome page as shown below.

Now that we have a running ASP.NET Core Web Application, let's deploy it on docker.
Step 2: Create a Dockerfile
In order to build the docker image for any application, we need to create a corresponding DockerFile. A Dockerfile is a text file that contains instructions for building a Docker image.
To create a Dockerfile for a .NET Core application, create a new file with the name Dockerfile in the root of your project and add the following content to it:
FROM mcr.microsoft.com/dotnet/sdk:7.0 AS build-env

WORKDIR /App


# Copy everything

COPY . ./

# Restore as distinct layers

RUN dotnet restore

# Build and publish a release

RUN dotnet publish -c Release -o out


# Build runtime image

FROM mcr.microsoft.com/dotnet/aspnet:7.0

WORKDIR /App

COPY --from=build-env /App/out .

ENTRYPOINT ["dotnet", "NetCoreWithDockerDemo.dll"]
Let's understand the file above. The Dockerfile uses the dotnet/sdk and dotnet/aspnet base images to build and run your .NET Core application.
It first restores the NuGet packages and builds the application in the build stage, and then copies the built application to the dotnet/aspnet base image in the final stage.
Step 3: Build the Docker image
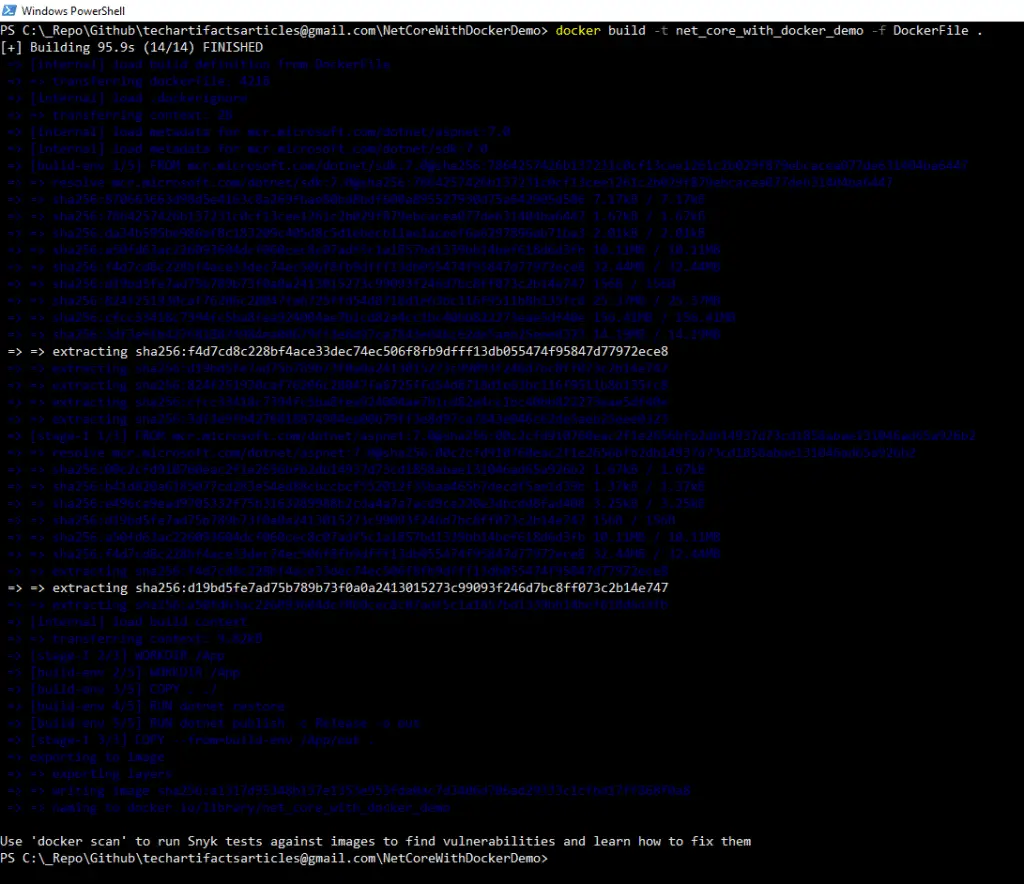
Now that we have a Dockerfile created, let's try to build a docker image which we can then deploy on docker. We can use the docker build command to build a Docker image for your .NET Core application.
Run the following command at the root of your project:
docker build -t net_core_with_docker_demo -f DockerFile .
Running this command will download all the dependent docker images and will also build a Docker image for our Web Application and assign it the tag net_core_with_docker_demo.
To confirm that the image is created and tagged, run the following command:
docker images
Once you run this command, you should be able to see the list of docker images on your machine.

Step 4: Run the Docker container
Now that we have successfully built the docker image, let's run this image in a docker container. Run the following command at the root of your project:
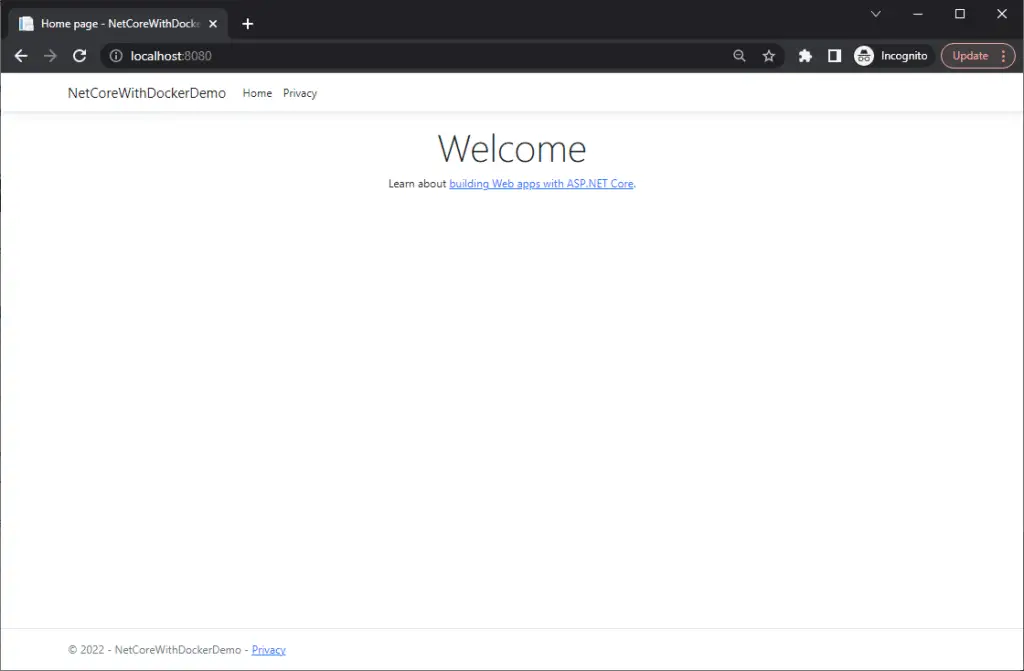
docker run -d -p 8080:80 --name net_core_with_docker_demo net_core_with_docker_demo
Running this command will run the application on docker as a container and will assign the container id to it. Also, if you look at the command we have bound the machine port 8080 to the container port 80 so that we can access the application running inside the container using the address "http://localhost:8080".

If you have installed the docker desktop, you can also view the container running inside it and also view the logs for the container.

Now open the browser and navigate to the address "http://localhost:8080" and you should be able to see the application running.
That's it. You have successfully deployed your first .NET Core application as a Docker Container.
You can find the entire code for this blog on my GitHub repository here.