
In this article, we will see Distributed caching, Redis cache, and also Redis caching in ASP.NET Core.
Follow me on Github and Download source code from GitHub
Table of Content
- What is distributed caching and its benefit
- IDistributedCache interface
- Framework provided to implement
- Distributed Redis cache
- Setting up Redis on Windows 10
- Redis CLI commands
- Steps to integrate Redis cache in ASP.NET core
- Summary
What is distributed caching and its benefit
Distributed caching is when you want to handle caching outside of your application. This is also can be shared by one or more application/servers. Distributed cache is application-specific i.e., multiple cache providers that support distributed caches. To implement distributed cache, we can use Redis and NCache. We will see about Redis cache in detail.
A distributed cache can improve the performance and scalability of an ASP.NET Core app, especially when the app is hosted by a cloud service or a server farm.
Benefits
- Data is consistent throughout multiple servers.
- This is more suitable for microservice architecture.
- In case of loading balancing, this is recommended.
- Multiple Applications / Servers can use one instance of Redis Server to cache data. This reduces the cost of maintenance in the longer run.
IDistributedCache interface
IDistributedCache Interface provides you with the following methods to perform actions on the actual cache
- GetAsync — Gets the Value from the Cache Server based on the passed key.
- SetAsync — Accepts a key and Value and sets it to the Cache server.
- RefreshAsync — Resets the Sliding Expiration Timer (more about this later in the article) if any.
- RemoveAsync — Deletes the cache data based on the key.
Framework provided to implement IDistributedCache
Register an implementation of IDistributedCache in Startup.ConfigureServices. Framework-provided implementations described in this topic include:
- Distributed Memory Cache
- Distributed SQL Server cache
- Distributed Redis cache
- Distributed NCache cache
Distributed Redis cache
Redis is an open source in-memory data store, which is often used as a distributed cache. You can configure an Azure Redis Cache for an Azure-hosted ASP.NET Core app, and use an Azure Redis Cache for local development.
Redis supports quite lot of data structures like string, hashed, lists, queries and much more and it’s fast key value based database that is written in C. It’s a NoSQL database as well. For this purpose, it is being used in Stackoverflow, Github and so on.
Setting Up Redis
We will see how we can setup Redis in local machine via two approach (Currently I am using Window 10)
1. First Approach by redis-server.exe
- Run redis-server.exe (Download from Github repo)
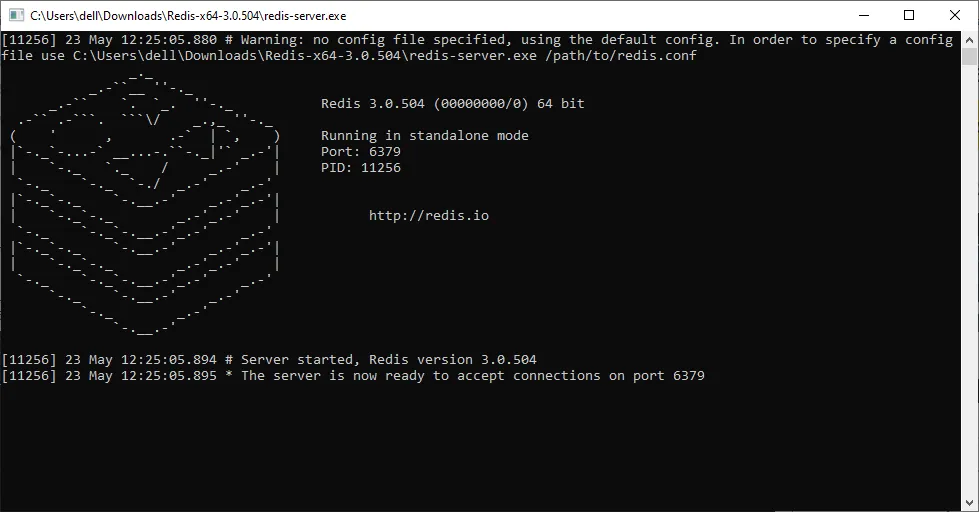
- Minimize the Redis-server.exe and open Redis-cli.exe.
- To test, just enter command
ping
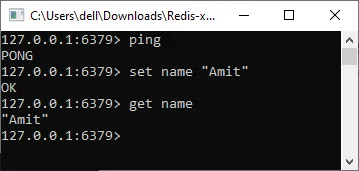
2. Second Approach via Chocolatey
Other way to install Redis on a Windows machine is chocolatey. To install chocolatey in a local machine, run the command given below from PowerShell (with administrative mode).
iex ((new-object net.webclient).DownloadString(‘https://chocolatey.org/install.ps1'))
This command downloads the chocalatey installer for Windows and using the command given below, we can install Redis on the local machine.
choco install redis-64
Once Redis Server is installed, use the command given below, where we can start Redis Server
redis-server
Running redis-server
I will use first approach to run server (ie., via redis-server.exe)
Go to the path and open up Powershell and run the following command
By default, Redis runs on the local 6379 port. To change port number
./redis-server --port {your_port}
Once Redis is running at your defined port, the Redis CLI would no longer work. This is because it tries to connect to 6379 by default. To override this, open up PowerShell again and enter the following command
./redis-cli -p {your_port}
Redis CLI Commands
Below are some command which is run on PowerShell.
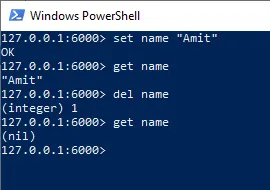
Setting a key with expiration time (in seconds) and ttl name is for Time left to expire.
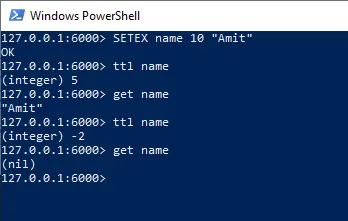
Steps to integrate Redis cache in ASP.NET Core
Step 1: Make sure redis server is running
./redis-server --port 6000
Step 2: Install package that helps you communicate with the Redis server Microsoft.Extensions.Caching.StackExchangeRedis
Install-Package Microsoft.Extensions.Caching.StackExchangeRedis
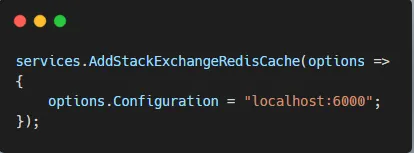
Step 3: configure in application to support Redis cache with specific port.
In startup.cs/ConfigureServices method.
Step 4: Implementing caching code snippet in Get call of WeatherForeCastController.
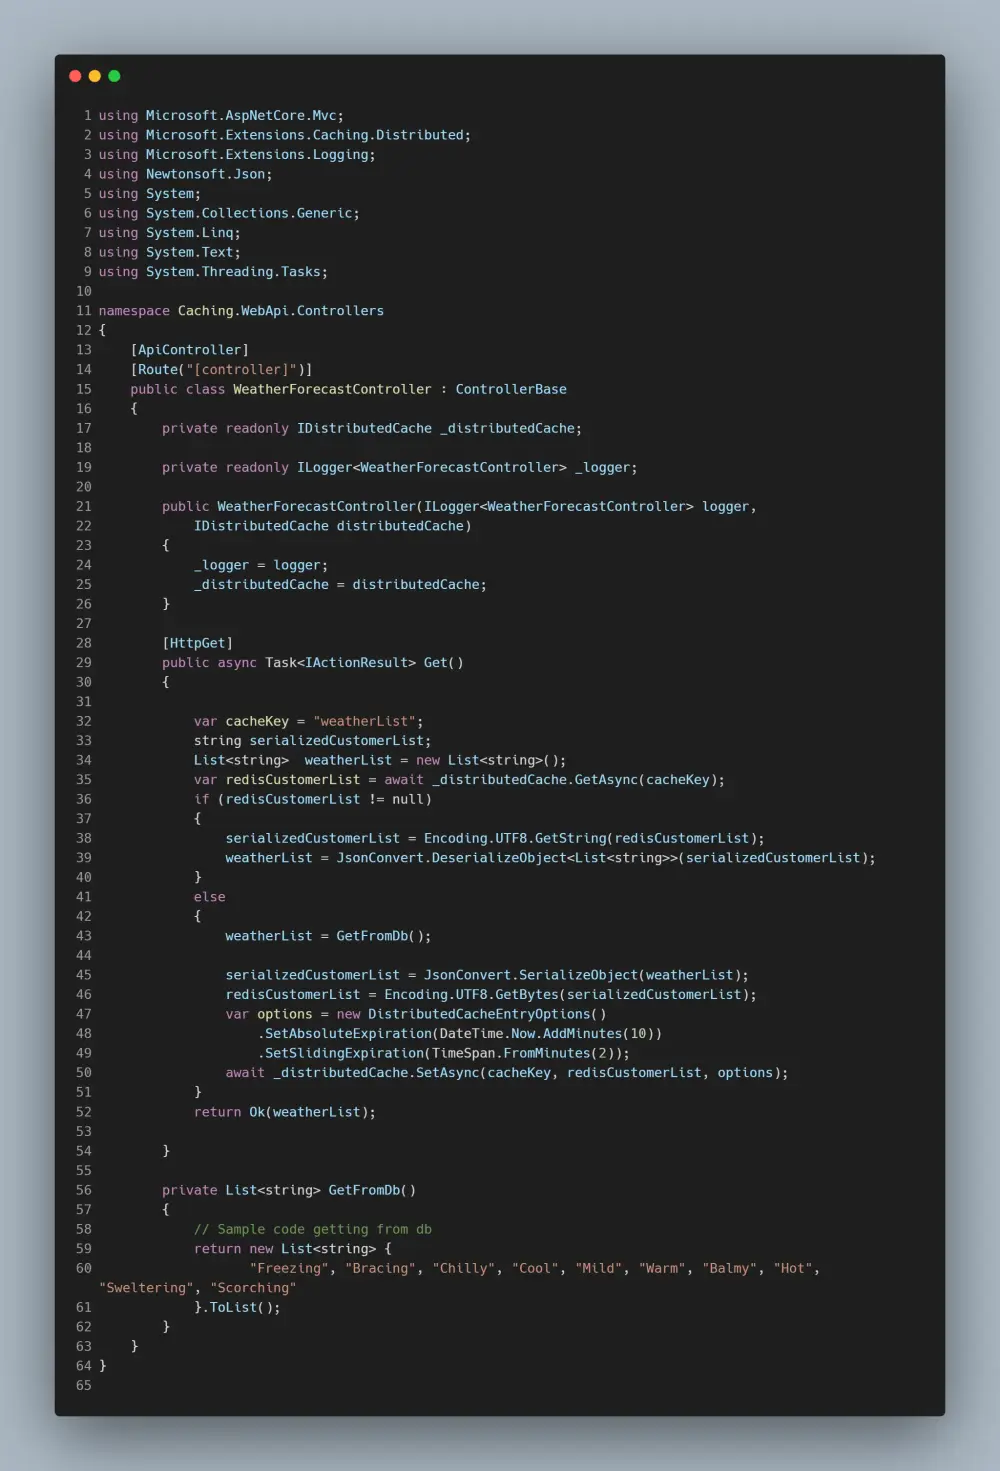
In Line 36, we check if key has a value in Redis, then convert it to a list of Weather list and send back the data and if the value does not exist in Redis, then access the database via efcore (in above code value is hardcoded), get the data and set it to redis.
If key has value then, the data will be stored in Redis as a byte array. We will be converting this array of a string. Which will be converts the string to an object of type, List (Line 38)
DistributedCacheEntryOptions
- SetAbsoluteExpiration — Here you can set the expiration time of the cached object.
- SetSlidingExpiration — This is similar to Absolute Expiration. It expires as a cached object if it not being requested for a defined amount of time period. Note that Sliding Expiration should always be set lower than the absolute expiration
Summary
In this detailed article, we have seen Distributed Caching, Redis. You can find the completed source code here. I hope you learned something new and detailed in this article. Thanks and happy coding!