Scenario: You are the web administrator for User Illusions, a virtual reality gaming company based in Hollywood, CA. You must ensure that your company website is up and running at all times. If an outage is detected, you must be notified so that you can take action quickly.
You will need to:
- Enable Application Insights on an Azure web app
- Create a URL ping test in Application Insights
- Configure an action group to notify you (via email) of an outage
Pre-requisites:
- For the above scenario
- App Service plan is enabled.
- Web-app is already created.
- Log-Analytics workspace is already created.
Configure Application Insights with Azure
Introduction
Application Insights can assist you in determining the availability and performance of your web applications. In this demonstration, you deploy Application Insights into the Azure environment and use it to run a URL ping test against the sample web app.
Solution
Log in to the Azure portal.
The Existence of Azure Resources (Pre-requisites)
Click on All Resources in the navigation menu to view the provisioned resources.
Survey the resources already provisioned in the resource group overview page: an App Service plan, a web app, and a Log Analytics workspace.
Click webappyou created for the App Service resource.
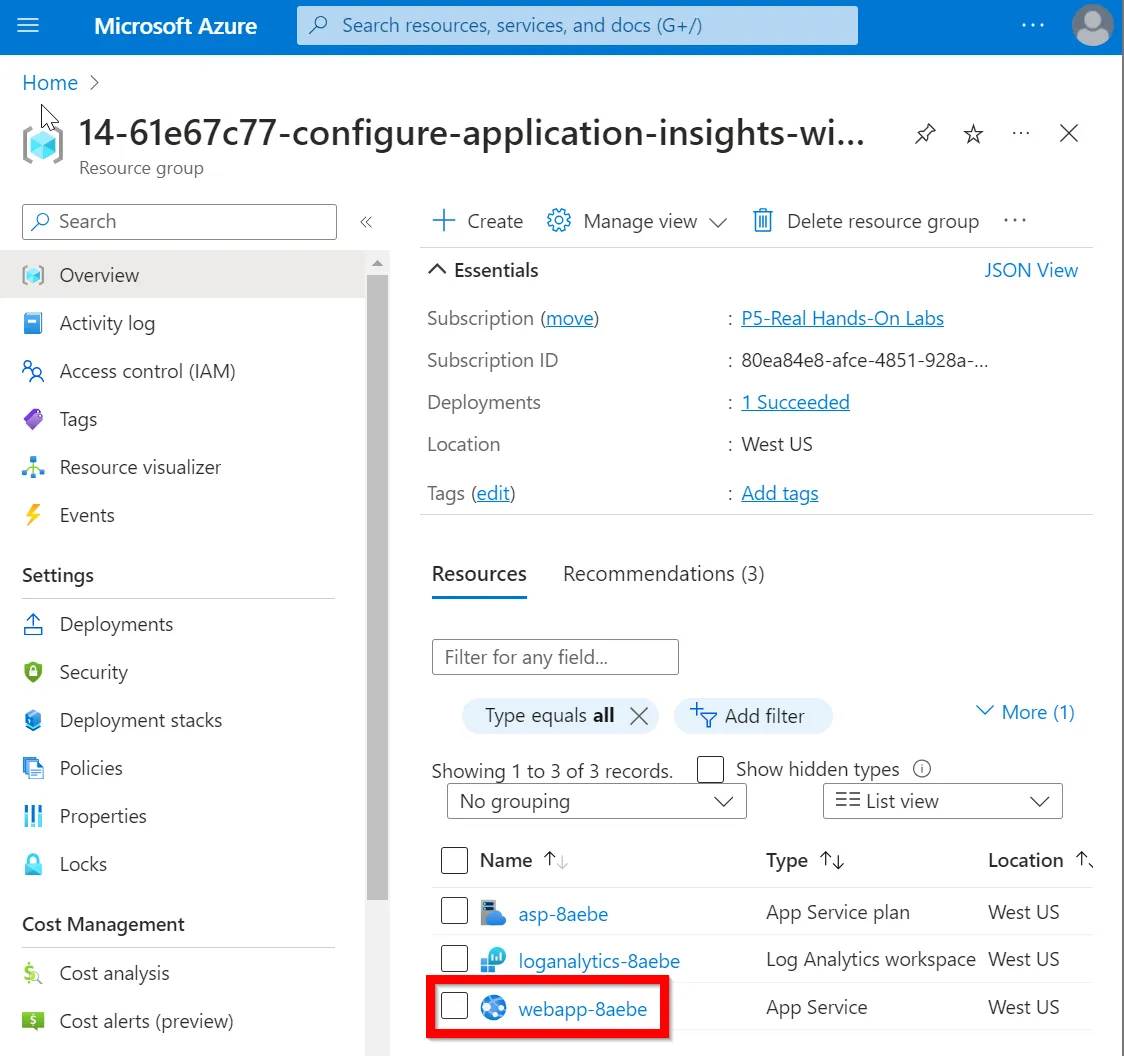
In the upper left corner, right-click Browse, copy the link for the URL to your clipboard, and save it in a text file for later.

Click Browse to preview the website.
Configure Application Insights for the Azure Web App
In the left navigation menu, under Settings, click Application Insights.
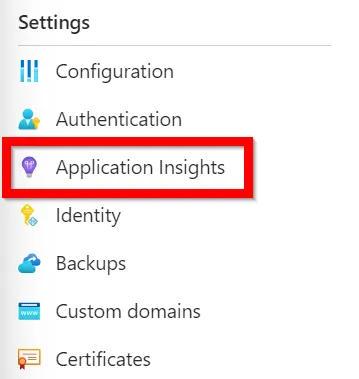
Click Turn on Application Insights.

Under Log Analytics Workspace, click on the dropdown menu and select the existing Log Analytics workspace; it will correspond with the name of the Azure web app (i.e., not the new one).

Under Instrument your application, select .NET.
Under Collection level, choose Basic.
Click Apply; then, click Yes.
Create and configure the URL ping test
Once it’s deployed, in the upper left breadcrumb trail, click on the resource group.
In the top toolbar, click on the Refresh icon; you should see the new Application Insights instance.

Click on that new Application Insights instance.
In the left navigation menu, under Investigate, click Availability.
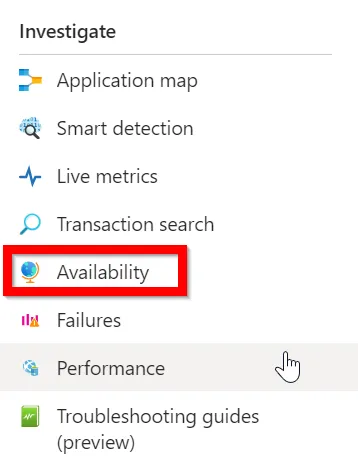
In the top toolbar, click + Add Classic test.
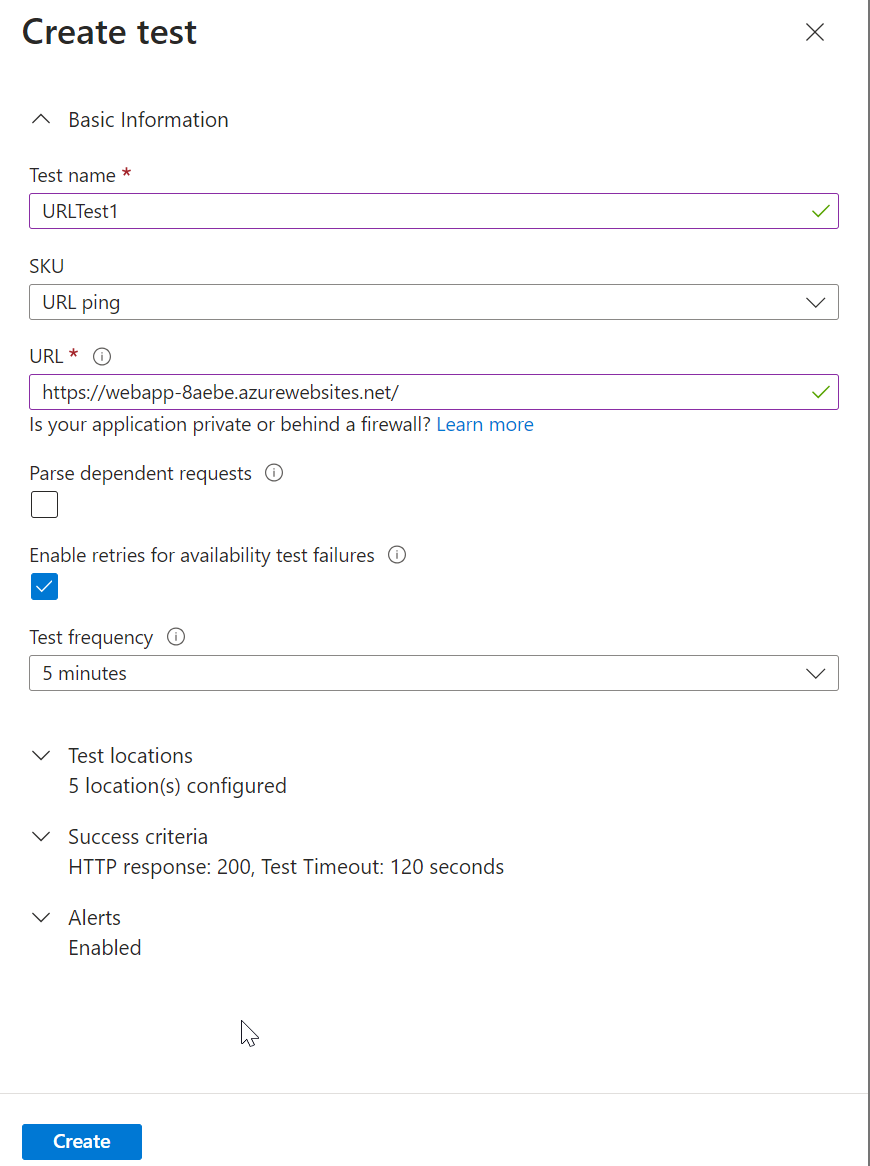
In the right Create test pane, Enter URLTest1 for the Test name.
Ensure the SKU is URL ping.
Under URL, paste in the URL you copied from webapp.
Click Create.
Once it’s created, you should see it under Availability Test.
Click the ‘…’ at the end of the URLTest1 row.
Select Open Rules (Alerts) page.
Create Action Group
- In the Rules pane, click the link to open the rule.
- In the upper right corner, click Edit.
- Scroll down and, under Actions, click Select action groups.
- In the right Select action groups pane, click + Create action group.
- In the Basics tab, under Instance details > Action group name, enter ActionGroup1.
- Click Next: Notifications.
- Under Notification type, click on the dropdown menu and select Email/SMS message/Push/Voice.
- For the Name, enter EmailMe.
- On the right-hand pane, click the checkbox next to Email to select it.
- Enter your email address in the Email field.
- Click OK.
- Click Review + create.
- Click Create.
- Check your email account to verify you’ve received a notification about being added to the action group.
- Click Save in the upper left corner.
- In the upper left breadcrumb trail, click on the Azure Insights instance.
- In the top toolbar, click on the Refresh icon.
- Under Availability Test, click on URLTest1 to expand the ping test; you should see 100% availability.

Cause an App Service failure
In the upper left breadcrumb trail, click on the resource group.
Click the link for the App Service resource.
In the top toolbar, click Stop.
On the Stop web app pop-up, click Yes.
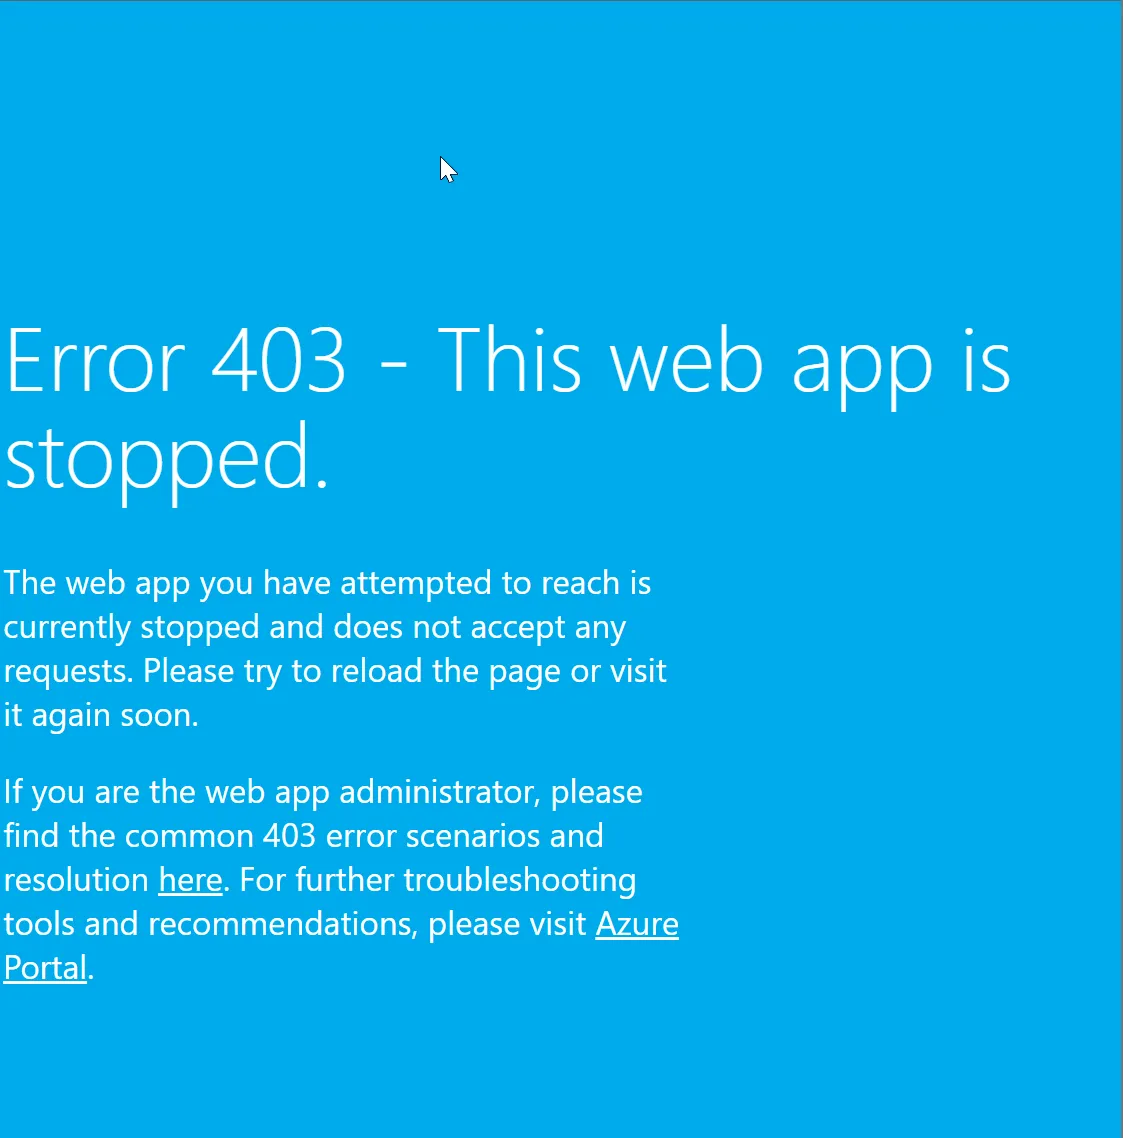
Navigate back to the browser tab previewing the website, and refresh the page; you should see Error 403.
Back in the Azure portal, in the upper left breadcrumb trail, click on the resource group.
Click the link for the Application Insights resource.
In the left navigation menu, under Investigate, click Availability.
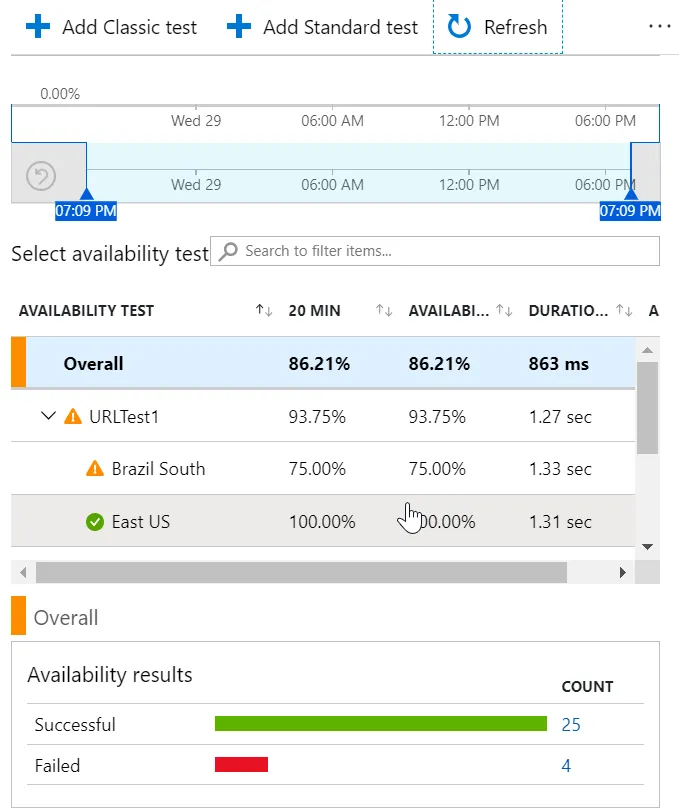
Under Availability Test, click on URLTest1 to expand the ping test.
In the top toolbar, click on the Refresh icon until multiple locations indicate an error. This may take up to five minutes.
Wait for Alert Email
Check your email and refresh your mailbox until you receive the alert email regarding the availability test failure.
Conclusion
Congratulations — you’ve completed configuring Application Insights in Azure.