Introduction
Building real-time applications has become essential in modern web development, especially for features like notifications, chat systems, and live updates. SignalR, a powerful library for ASP.NET, enables seamless real-time communication between server-side code and client-side web applications. In this guide, we’ll walk through creating real-time notifications in .NET Core 8 using Minimal APIs and SignalR, ensuring your applications stay responsive and engaging.
Why use SignalR?
- Real-Time communication: It enables real-time updates, which is crucial for modern, dynamic applications such as chat systems, gaming, live sports updates, and collaborative applications.
- Simplified development: SignalR provides a simple API that abstracts the complexities of real-time communications, making it easier for developers to implement these features.
- Cross-platform: SignalR supports multiple platforms, including .NET, JavaScript, and Xamarin, allowing for broad applicability across different types of applications.
- Automatic reconnection: SignalR handles automatic reconnection in case of a dropped connection, ensuring the reliability of real-time communication.
- Scalability: SignalR is scalable and can be used in conjunction with other services like Azure SignalR Service, which handles the scale-out needs and provides high availability.
Creating a SignalR server
Installation
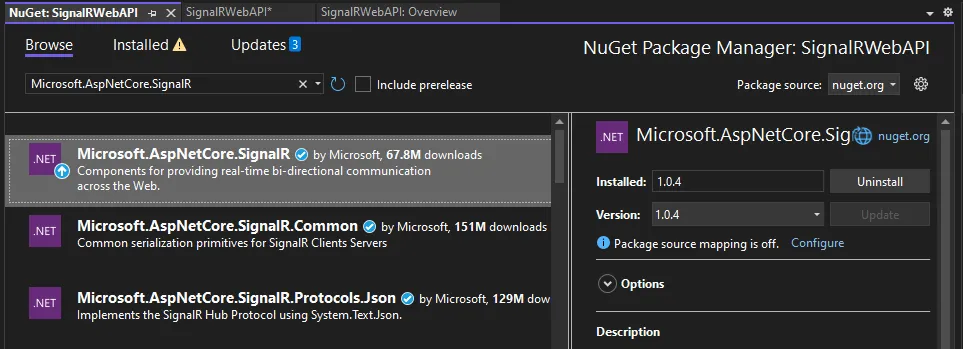
First, let’s install the SignalR package. You can do this via the NuGet Package Manager Console in Visual Studio with the following command:
Install-Package Microsoft.AspNetCore.SignalR
Alternatively, you can install it using the NuGet Package Manager UI by searching for “Microsoft.AspNetCore.SignalR”.
Create ASP.Net Core Web API project
Step 1
Open Visual Studio and click on Create New Project.
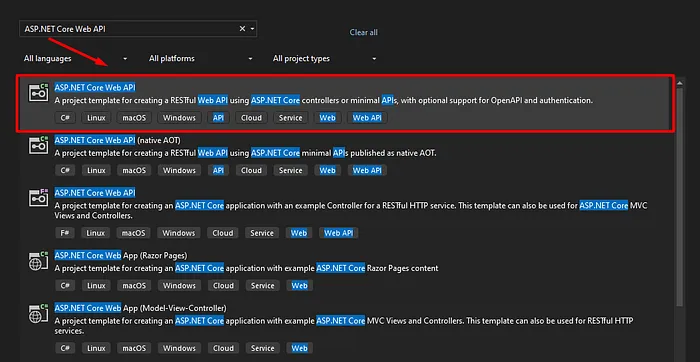
Step 2
Select ASP.NET Core Web API Template as shown in the below image and click on next button.
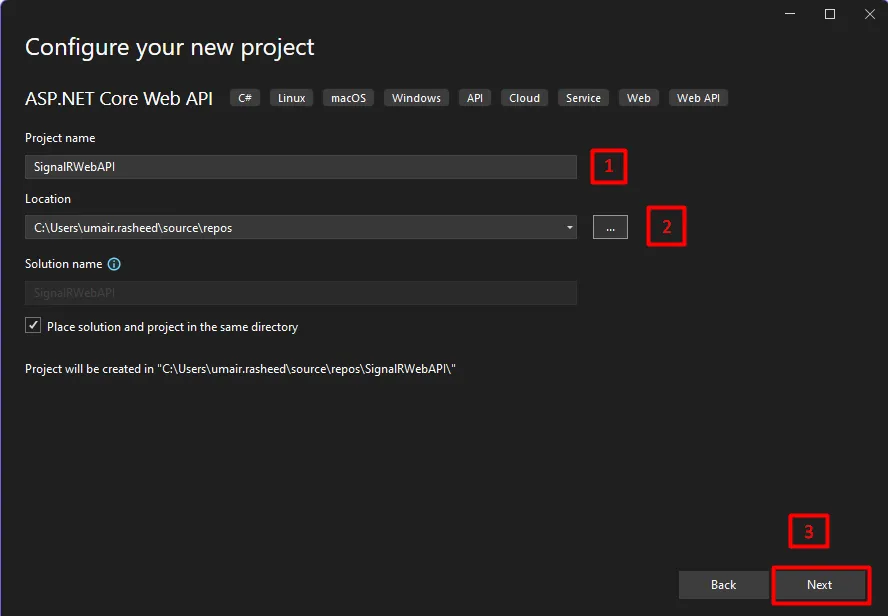
Step 3
Configure your project by specifying the name of the project and the location where you want to save your project.
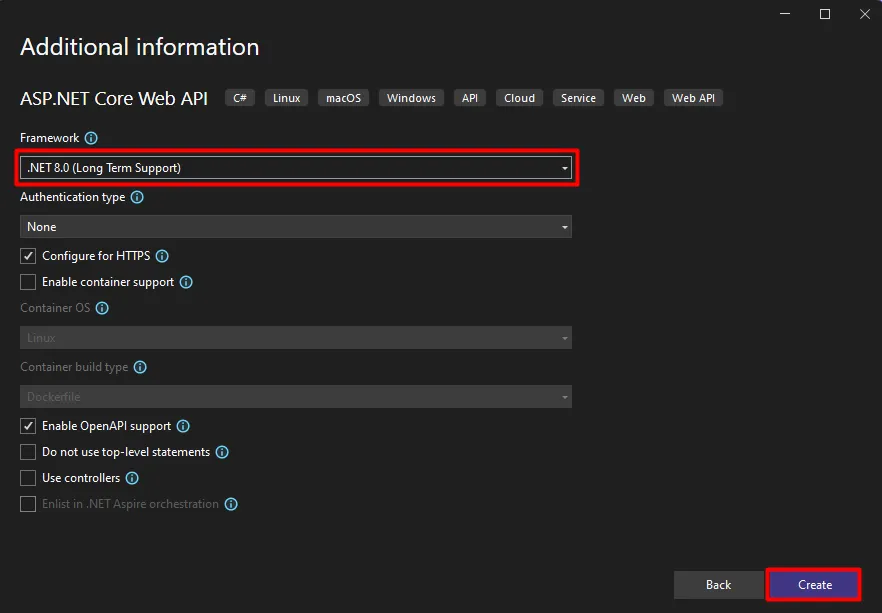
Step 4
Select the version of the .Net Core framework you want to use and click on create button.
Step 5
Go to Program.cs and add service for SignalR.
builder.Services.AddSignalR();
Step 6
Add class StockHub.cs
using Microsoft.AspNetCore.SignalR;

namespace SignalRWebAPI

{

    public class StockHub:Hub

    {

        public async Task SendStockPrice(string stockName, decimal price)

        {

            await Clients.All.SendAsync("ReceiveStockPrice", stockName, price);

        }

        public override async Task OnConnectedAsync()

        {

            string connectionId = Context.ConnectionId;

            await base.OnConnectedAsync();

        }

    }

}
Step 7
Go to Program.cs and map the stockHub
app.MapHub<StockHub>("/hubs/stock");
Step 8
Background Service to push notifications continuously.
Add class Worker.cs
using Microsoft.AspNetCore.SignalR;


namespace SignalRWebAPI

{

    public class Worker : BackgroundService

    {

        private readonly ILogger<Worker> _logger;

        private readonly IHubContext<StockHub> _stockHub;

        private const string stockName = "Basic Stock Name";

        private decimal stockPrice = 100;


        public Worker(ILogger<Worker> logger, IHubContext<StockHub> stockHub)

        {

            _logger = logger;

            _stockHub = stockHub;

        }

        protected override async Task ExecuteAsync(CancellationToken stoppingToken)

        {

            while (!stoppingToken.IsCancellationRequested)

            {

                try

                {

                    _logger.LogInformation("Worker running at: {time}", DateTimeOffset.Now);


                    Random rnd = new Random();

                    decimal stockRaise = rnd.Next(1, 10000);

                    //List of stock names

                    string[] stockNames = { "Apple", "Microsoft", "Google", "Amazon", "Facebook" };

                    //Random stock name

                   var stockName = stockNames[rnd.Next(0, stockNames.Length)];

                    //Send Notification

                    await _stockHub.Clients.All.SendAsync("ReceiveStockPrice", stockName, stockRaise);


                    _logger.LogInformation("Sent stock price: {stockName} - {stockRaise}", stockName, stockRaise);


                    await Task.Delay(4000, stoppingToken);

                }

                catch (Exception ex)

                {

                    _logger.LogError(ex, "Error sending stock price");

                }

            }

        }

    }

}
Add this background service in Program.cs
builder.Services.AddHostedService<Worker>();
SignalR Receiver
Server Side
Add new console project separately or with in the same solution file.
Remove all code from Program.cs of console app and past the below code.
using Microsoft.AspNetCore.SignalR.Client;


// here is SignalR Sender URL

string hubUrl = "https://localhost:7091/hubs/stock";

var hubConnection = new HubConnectionBuilder()

    .WithUrl(hubUrl)

    .Build();


// Register a handler for messages from the SignalR hub

// "ReceiveStockPrice" is the topic to which SignalR sending the singnals

hubConnection.On<string, decimal>("ReceiveStockPrice", (stockName, stockPrice) =>

{

    Console.WriteLine($"Message received--> Stock Name: {stockName} Stock Price: {stockPrice}");

});


try

{

    // Start the connection

    hubConnection.StartAsync().Wait();

    Console.WriteLine("SignalR connection started.");

}

catch (Exception ex)

{

    Console.WriteLine($"Error connecting to SignalR: {ex.Message}");

    throw;

}

// Create a cancellation token to stop the connection

CancellationTokenSource cancellationTokenSource = new CancellationTokenSource();


// hubConnection.StopAsync().Wait();

var cancellationToken = cancellationTokenSource.Token;


// Handle Ctrl+C to gracefully shut down the application

Console.CancelKeyPress += (sender, a) =>

{

    a.Cancel = true;

    Console.WriteLine("Stopping SignalR connection...");

    cancellationTokenSource.Cancel();

};

try

{

    // Keep the application running until it is cancelled

    await Task.Delay(Timeout.Infinite, cancellationToken);

}

catch (TaskCanceledException)

{

}

// Stop the connection gracefully

await hubConnection.StopAsync();


Console.WriteLine("SignalR connection closed.");

Client side
Index.html
<!DOCTYPE html>

<html lang="en">

<head>

    <meta charset="UTF-8">

    <meta name="viewport" content="width=device-width, initial-scale=1.0">

    <title>SignalR Client</title>

    <script src="https://cdnjs.cloudflare.com/ajax/libs/microsoft-signalr/3.1.18/signalr.min.js"></script>

</head>

<body>

    <h1>Stock Prices</h1>

    <div id="stockPrices"></div>


    <script>

        const connection = new signalR.HubConnectionBuilder()

            .withUrl("https://localhost:7091/hubs/stock")

            .build();


        connection.on("ReceiveStockPrice", (stockName, stockPrice) => {

            const stockPricesDiv = document.getElementById("stockPrices");

            const newPrice = document.createElement("div");

            newPrice.textContent = `Stock received: ${stockName} - ${stockPrice}`;

            stockPricesDiv.appendChild(newPrice);

        });


        connection.start()

            .then(() => {

                console.log("SignalR connection started.");

            })

            .catch(err => {

                console.error("Error connecting to SignalR: ", err);

            });


        window.addEventListener("beforeunload", () => {

            connection.stop().then(() => {

                console.log("SignalR connection stopped.");

            }).catch(err => {

                console.error("Error stopping SignalR connection: ", err);

            });

        });

    </script>

</body>

</html>
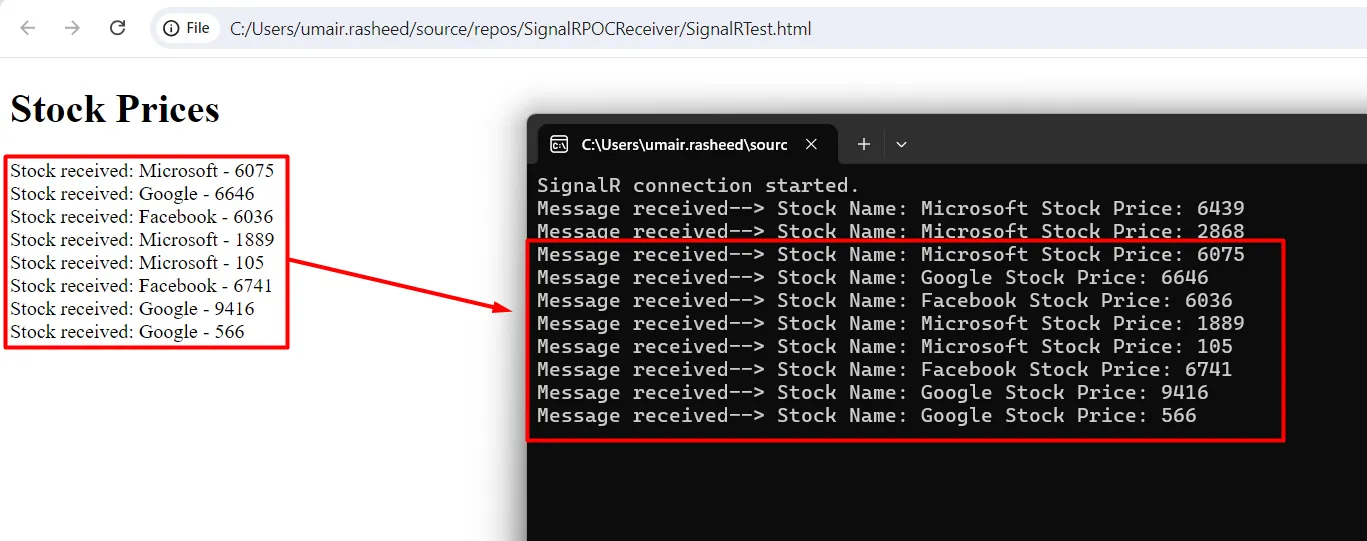
Now receiving notifications both on Web and console App.
Implementing a Real-Time Notification Endpoint
app.MapPost("sendStockNotification", async (

    string stockName,

    decimal price,

    IHubContext<StockHub> context) =>

{

    await context.Clients.All.SendAsync("ReceiveStockPrice", stockName, price);

});
When a client sends a POST request to the sendStockNotification endpoint with the stock name and price, this code will broadcast the stock price update to all connected clients in real time. The clients will receive this update through the "ReceiveStockPrice" method, which they have subscribed to.
Happy coding!
I hope you find this article helpful. You can download source code from my GitHub