Schedule and run background jobs using this powerful framework
Disclaimer: the image mentioned in this article is currently marked as preview. Opinions expressed therein are solely my own and do not express the views or opinions of my employer.

Hangfire provides a framework that performs background processing for .NET and .NET Core applications without creating a Windows Service or requiring a separate process. Hangfire is open and free for commercial use (subscriptions allow you to use additional options) and is backed by persistent storage.
The HangFire architecture is simply a client/server model with persistence using Microsoft SQL Server. HangFire Server queries the Storage to perform the required background jobs. The Server component works by using a set of background threads to listen to the Storage for new jobs then performs the required task by de-serializing type, method, and arguments. The Client component creates the background jobs by saving them to the Storage component.
Prerequisites
Installation and Configuration
The instructions below detail a simple HangFire project built using Microsoft’s Visual Studio 2022.
- Open Visual Studio 2022.
- Create a new project.
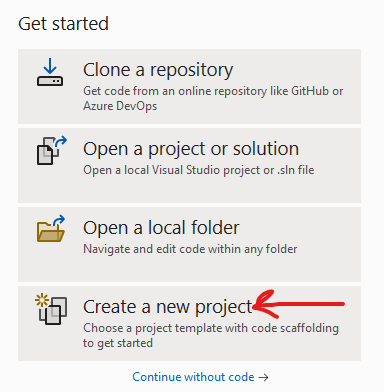
3. Select ASP.NET Core Web App.

Click the Next button to move to the next step.
4. Give your Project a name, e.g., MyScheduler.
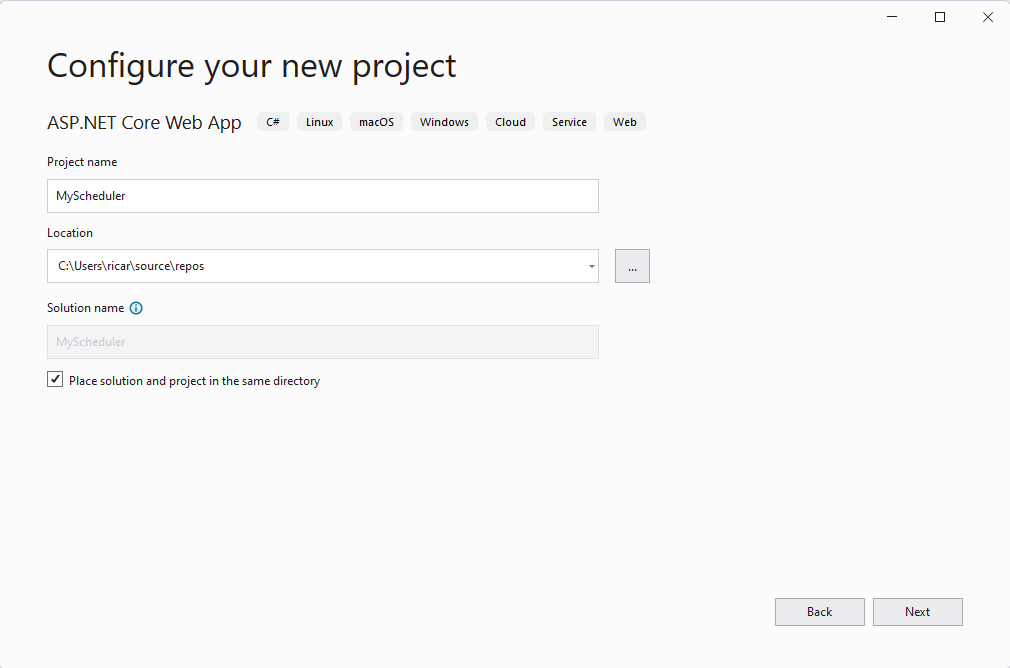
Click the Next button to move to the next step.
5. Select Windows from the Authentication type and ensure the checkbox is marked: Do not use top level domain statements:
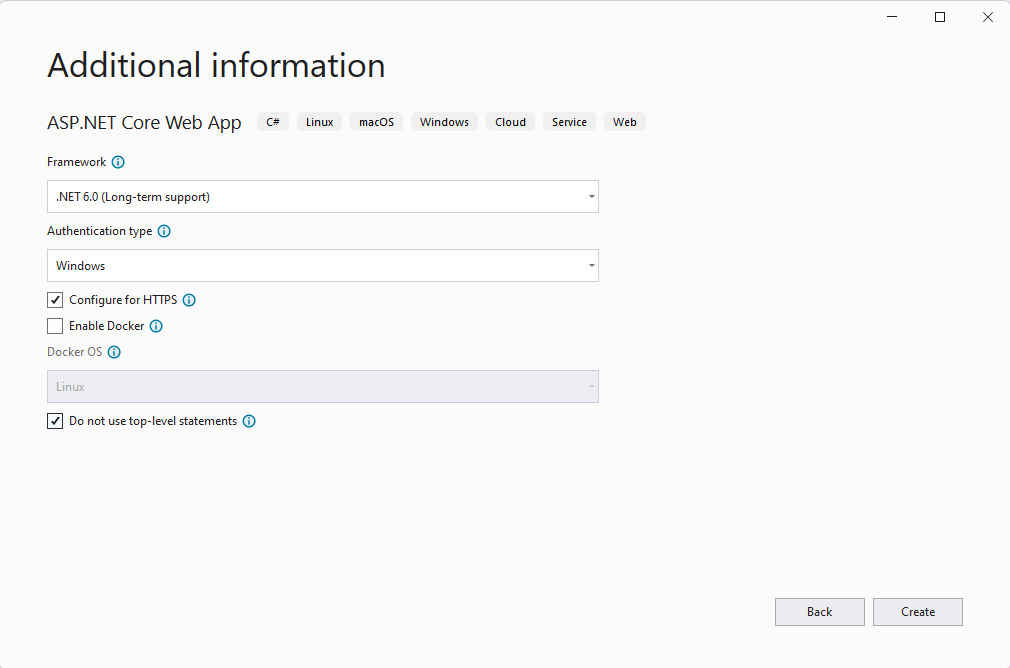
Click the Create button.
6. Add the following NuGet packages:
dotnet add package Hangfire.Core

dotnet add package Hangfire.AspNetCore

dotnet add package Hangfire.SqlServer
7. In the Program.cs, add the following right after the following line:
var builder = WebApplication.CreateBuilder(args);
Add the following using statements to the top of this file:
using Hangfire;
using Hangfire.SqlServer;
// Add Hangfire services.

builder.Services.AddHangfire(configuration => configuration

    .SetDataCompatibilityLevel(CompatibilityLevel.Version_170)

    .UseSimpleAssemblyNameTypeSerializer()

    .UseRecommendedSerializerSettings()

    .UseSqlServerStorage(builder.Configuration.GetConnectionString(

    "HangfireConnection"), new SqlServerStorageOptions

{

    CommandBatchMaxTimeout = TimeSpan.FromMinutes(5),

    SlidingInvisibilityTimeout = TimeSpan.FromMinutes(5),

    QueuePollInterval = TimeSpan.Zero,

    UseRecommendedIsolationLevel = true,

    DisableGlobalLocks = true

}));


// Add the processing server as IHostedService

builder.Services.AddHangfireServer();
For testing purposes, you can place a statement like the following right after the call to app.Run();
BackgroundJob.Enqueue(() => Console.WriteLine(“Hello, world!”));

using (var server = new BackgroundJobServer())

{

    Console.ReadLine();

}
Add the connection string to the appsettings.json file:
"ConnectionStrings": {

    "HangfireConnection": "Server=localhost;Database=HangfireTest;Integrated Security=SSPI;"

},
Adding Dashboard UI
The following code snippet details how you would add the Dashboard UI to use all the Hangfire features immediately. The following steps are fully optional, and you should remove them completely, if your application only creates background jobs.
Authorization configuration required for non-local requests
The default behavior is only local access is permitted to the Hangfire Dashboard. According to the official documentation, Dashboard authorization must be configured to allow remote access.
Right after the app.UseStaticFiles()
add the following line of code:
app.UseStaticFiles();

app.UseHangfireDashboard();
Then, right after the use authorization call, add the following code in bold:
app.UseAuthorization();

app.UseEndpoints(endpoints =>

{

    endpoints.MapControllers();

    endpoints.MapHangfireDashboard();

});
From the official documentation,
“Hangfire Dashboard exposes sensitive information about your background jobs, including method names and serialized arguments as well as gives you an opportunity to manage them by performing different actions — retry, delete, trigger, etc. So, it is important to restrict access to the Dashboard.
To make it secure by default, only local requests are allowed, however you can change this by passing your own implementations of the IDashboardAuthorizationFilter interface, whose Authorize method is used to allow or prohibit a request. The first step is to provide your own implementation.”
public class MyAuthorizationFilter : IDashboardAuthorizationFilter

{

    public bool Authorize (DashboardContext context)

    {

        var httpContext = context.GetHttpContext();


        // IMPORTANT: Allowing authenticated users to see the Dashboard is potentially dangerous!

        return httpContext.User.Identity.IsAuthenticated;

    }

}
The final step will be to add the following to Program.cs:
app.UseHangfireDashboard("/hangfire", new DashboardOptions

{

    Authorization = new[] { new MyAuthorizationFilter() }

});
Now, you can run the application and review the server console window for the Hello World output.
NOTE: When you run the application for the first time, it will create the necessary tables for Hangfire to function in the configured database.
The example project is available on GitHub.