
SignalR is a popular software library that allows you send server code to client-side applications, like a React application. This tutorial will show you how to install SignalR on both your ASP.NET Core and React Typescript application.
Creating your Applications
When creating your ASP.NET Core application, there is an option to create your application with an React.js application.
Once you have successfully created your ASP.NET Core application, we are going to delete everything inside the "ClientApp" folder, including the folder itself. The "ClientApp" folder contains the React app created when we set up our ASP.NET Core application. We want to recreate this!
At this stage, you want to make sure that you have NodeJS installed on your machine. When NodeJS is installed, you can install packages from the NPM package library using "npm" at the start of your command line prompt. You may also want to install Yarn.
Yarn is similar to NPM, but they state that it "caches every package it has downloaded, so it never needs to download the same package again.".
For the purposes of this tutorial, we are going to use Yarn in our command line prompts.
You can install Yarn by running the following in your favourite command prompt application:
npm install yarn -g
Notice the "-g" parameter at the end. This ensures that it is installed globally on your machine.
Now going back to recreating your React app. It's time to recreate it with TypeScript. In your command prompt, change directory to the root folder of your ASP.NET Core application. Run the following command prompt:
yarn create react-app clientapp --template typescript
Note in the above command line that "clientapp" is all lowercase. It will not allow you to use uppercase letters. As a result of this command line prompt, your React application will be created into "clientapp". More importantly, it will create it using TypeScript.
Installing SignalR on your React App
Using the command line prompt again, change the directory so you are inside the "clientapp" folder. We are going to install the @microsoft/signalr application from NPM. You can do that by running the following command prompt:
yarn install @microsoft/signalr
As a result, this will install the SignalR library into our React app. Now that we have SignalR in our React app, we are going to make some code changes inside App.tsx which are shown below:
// App.tsx

import React, { useState, useEffect } from "react";

import "./App.css";

import * as signalR from "@microsoft/signalr";


const App: React.FC = () => {


  // Builds the SignalR connection, mapping it to /chat

  const hubConnection = new signalR.HubConnectionBuilder()

  .withUrl("/chat")

  .configureLogging(signalR.LogLevel.Information)

  .build();


  // Starts the SignalR connection

  hubConnection.start().then(a => {

    // Once started, invokes the sendConnectionId in our ChatHub inside our ASP.NET Core application.

    if (hubConnection.connectionId) {

      hubConnection.invoke("sendConnectionId", hubConnection.connectionId);

    }

  });


    const SignalRTime: React.FC = () => {

      // Sets the time from the server

      const [time, setTime] = useState<string | null>(null);


      useEffect(() => {

        hubConnection.on("setTime", message => {

          setTime(message);

        });

      });


      return <p>The time is {time}</p>;

    };


    const SignalRClient: React.FC = () => {

      // Sets a client message, sent from the server

      const [clientMessage, setClientMessage] = useState<string | null>(null);


      useEffect(() => {

        hubConnection.on("setClientMessage", message => {

          setClientMessage(message);

        });

      });


      return <p>{clientMessage}</p>

    };


    return <><SignalRTime /><SignalRClient /></>;

};


export default App;
At present, this code will throw an error. The next step is to integrate SignalR into your ASP.NET Core application.
Installing SignalR on your ASP.NET Core application
Load up Visual Studio 2019 and open your ASP.NET Core application. Go to Tools -> NuGet Package Manager -> Package Manager Console. Run the following command inside the Package Manager Console:
Install-Package Microsoft.AspNetCore.SignalR.Client
This will install SignalR in your ASP.NET Core Application from the NuGet Package Library. Then open up your Startup.cs file and add the following line inside your ConfigureServices method:
services.AddSignalR();
Next, create your SignalR hub. This will inherit the Hub class from the SignalR package. Named ChatHub, we will include a SendConnectionId method. This method is invoked when we start our SignalR connection in our React app:
// ChatHub.cs

using Microsoft.AspNetCore.SignalR;

using System.Threading.Tasks;


namespace SignalR_Test.Hubs

{

    public class ChatHub : Hub

    {

        public async Task SendConnectionId(string connectionId)

        {

            await Clients.All.SendAsync("setClientMessage", "A connection with ID '" + connectionId + "' has just connected");

        }

    }

}
Inside the SendConnectionId method, we are sending a message to all clients connected. We are sending this message through the setClientMessage method that gets listened out for in our React app.
Now, going back to our Startup.cs file, we are going to find our Configure method. We are going to add a new parameter called "hostApplicationLifetime". This parameter is of type IHostApplicationLifetime (or IApplicationLifetime in .NET Core 2). Then we will add the following code inside our Configure method:
hostApplicationLifetime.ApplicationStarted.Register(() =>

            {


                var serviceProvider = app.ApplicationServices;

                var chatHub = (IHubContext<ChatHub>)serviceProvider.GetService(typeof(IHubContext<ChatHub>));


                var timer = new System.Timers.Timer(1000);

                timer.Enabled = true;

                timer.Elapsed += delegate (object sender, System.Timers.ElapsedEventArgs e) {

                    chatHub.Clients.All.SendAsync("setTime", DateTime.Now.ToString("dddd d MMMM yyyy HH:mm:ss"));

                };

                timer.Start();

            });
What this does is when the application has started, it starts up a timer which refreshes every second. After every second, it will send the time to all clients connected through SignalR. It will use the setTime method and will send the current server time.
Here is the full code for Startup.cs:
// Startup.cs

using Microsoft.AspNetCore.Builder;

using Microsoft.AspNetCore.Hosting;

using Microsoft.AspNetCore.SignalR;

using Microsoft.AspNetCore.SpaServices.ReactDevelopmentServer;

using Microsoft.Extensions.Configuration;

using Microsoft.Extensions.DependencyInjection;

using Microsoft.Extensions.Hosting;

using SignalR_Test.Hubs;

using System;


namespace SignalR_Test

{

    public class Startup

    {

        public Startup(IConfiguration configuration)

        {

            Configuration = configuration;

        }


        public IConfiguration Configuration { get; }


        // This method gets called by the runtime. Use this method to add services to the container.

        public void ConfigureServices(IServiceCollection services)

        {

            services.AddControllersWithViews();


            // In production, the React files will be served from this directory

            services.AddSpaStaticFiles(configuration =>

            {

                configuration.RootPath = "ClientApp/build";

            });


            services.AddSignalR();

        }


        // This method gets called by the runtime. Use this method to configure the HTTP request pipeline.

        public void Configure(IApplicationBuilder app, IWebHostEnvironment env, IHostApplicationLifetime hostApplicationLifetime)

        {

            if (env.IsDevelopment())

            {

                app.UseDeveloperExceptionPage();

            }

            else

            {

                app.UseExceptionHandler("/Error");

                // The default HSTS value is 30 days. You may want to change this for production scenarios, see https://aka.ms/aspnetcore-hsts.

                app.UseHsts();

            }

            app.UseHttpsRedirection();

            app.UseStaticFiles();

            app.UseSpaStaticFiles();


            app.UseRouting();

            app.UseEndpoints(endpoints =>

            {

                endpoints.MapHub<ChatHub>("/chat");


                endpoints.MapControllerRoute(

                    name: "default",

                    pattern: "{controller}/{action=Index}/{id?}");

            });


            app.UseSpa(spa =>

            {

                spa.Options.SourcePath = "ClientApp";


                if (env.IsDevelopment())

                {

                    spa.UseReactDevelopmentServer(npmScript: "start");

                }

            });


            hostApplicationLifetime.ApplicationStarted.Register(() =>

            {


                var serviceProvider = app.ApplicationServices;

                var chatHub = (IHubContext<ChatHub>)serviceProvider.GetService(typeof(IHubContext<ChatHub>));


                var timer = new System.Timers.Timer(1000);

                timer.Enabled = true;

                timer.Elapsed += delegate (object sender, System.Timers.ElapsedEventArgs e) {

                    chatHub.Clients.All.SendAsync("setTime", DateTime.Now.ToString("dddd d MMMM yyyy HH:mm:ss"));

                };

                timer.Start();

            });

        }

    }

}
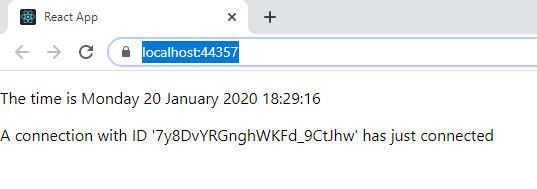
Once started, your application should look like this:
Versions
For the record, the versions I'm using in this tutorial are as follows:
- ASP.NET Core 3.1.1
- Microsoft.AspNetCore.SignalR.Client 3.1.1
- react 16.12.0
- react-scripts 3.3.0
- typescript 3.7.2
- @microsoft/signalr 3.1.0
A Bug with WebSocket when running a React App Securely
You may discover that sometimes SignalR works and sometimes it doesn't in a React app. You may see an error similar to this in your browser development tools:
WebSocket connection to 'ws://localhost:44357/sockjs-node' failed: Error during WebSocket handshake: net::ERR_CONNECTION_RESET
Now, SignalR uses Websocket to forge a connection between the client and browser (assuming your browser has support for Websocket). And like the HTTP protocol, Websocket's protocol is different when using a secure connection. When secure, it will use the wss protocol. The ws protocol is used when it's not secure.
However, there is a bug with the "react-dev-utils" package that is a package installed from NPM. Inside webpackHotDevClient.js, it attempts to connect to the WebpackDevServer via a socket. However, the protocol it states in that connection is ws. Here is the snippet of code:
// Connect to WebpackDevServer via a socket.

var connection = new WebSocket(

  url.format({

    protocol: 'ws',

    hostname: window.location.hostname,

    port: window.location.port,

    // Hardcoded in WebpackDevServer

    pathname: '/sockjs-node',

  })

);
As mentioned above, the "ws" protocol is the non-secure connection for WebSocket. This gives us a problem when running our application securely. There are three ways we can go about this:
- Change the protocol to "wss" inside webpackHotDevClient.js
- Specify SignalR to use LongPulling (an older method of integrating server and client applications)
- Run the application non-securely
Now, I've mentioned in previous posts about the importance about security, so that rules out the last option. I'm one who likes using new technology so that rules out the second option. So the only other option is to change the protocol to wss.
But it's not as simple as that! Because "react-dev-utils" is a package downloaded from NPM, it means that any one else using your React application will have to make that change. You will need to make sure that you document this change in your installation instructions.
You can see a full demonstration of this bug in action by watching the video below: