
The primary purpose of any caching mechanism is to improve performance of an application. As an ASP.NET developer you are probably aware that ASP.NET web forms as well as ASP.NET MVC could used Cache object to cache application data. This was often called server side data caching and was available as an inbuilt feature of the framework. Although ASP.NET Core doesn't have Cache object as such, you can implement in-memory caching quite easily. This article shows you how.
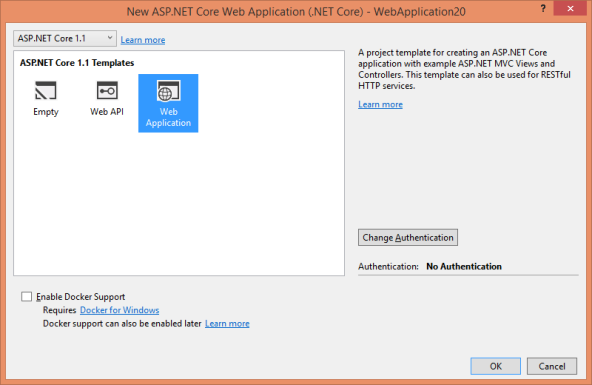
Before you read any further create a new ASP.NET Core application based on Web Application project template.
Then follow the steps mentioned below one-by-one to build and test various features offered by in-memory caching.
1. In-memory caching needs to enabled in the Startup class
Unlike ASP.NET web forms and ASP.NET MVC, ASP.NET Core doesn't have the built-in Cache object that you can directly used inside controllers. Here, in-memory caching works through dependency injection and hence the first step is to register the in-memory caching service in the Startup class. So, open the Startup class and locate the ConfigureServices() method. Modify the ConfigureServices() method to look like this:
public void ConfigureServices(IServiceCollection services)

{

    services.AddMvc();

    services.AddMemoryCache();

}
To add in-memory caching capabilities to your application you need to call AddMemoryCache() method on the services collection. This way the default implementation of an in-memory cache - an IMemoryCache object - can be injected to the controllers.
2. In-memory caching uses dependency injection to inject the cache object
Then open the HomeController and modify it as shown below:
public class HomeController : Controller

{

    private IMemoryCache cache;


    public HomeController(IMemoryCache cache)

    {

        this.cache = cache;

    }

    ....

}
As you can see, the above code declares a private variable of ImemoryCache. This variable gets assigned in the constructor. The constructor receives the cache parameter through DI and then this cache object is stored in the local variable for later use.
3. You can use Set() method to store an item in the cache
Once you have IMemoryCache object, you can read and write items or entries to it. Adding an entry into the cache is quite straightforward.
public IActionResult Index()

{

    cache.Set<string>("timestamp", DateTime.Now.ToString());

    return View();

}
The above code sets a cache entry in the Index() action. This is done using Set<T>() method of IMemoryCache. The first parameter to Set() method is a key name by which the entry will be identified. The second parameter is the value of the key. In this example we store a string key and string value but you can store other types (primitive types and custom types) also.
4. You can use Get() method to retrieve an item from the cache
Once you add an item into the cache, you would like to retrieve it elsewhere in the application. You can do so using the Get() method. The following code shows how.
public IActionResult Show()

{

    string timestamp = cache.Get<string>("timestamp");

    return View("Show",timestamp);

}
The above code retrieves a cached item from another action (Show) of the HomeController. The Get() method specifies the type of the item and its key. The item, if present, will be returned and assigned to timestamp string variable. This timestamp value is then passed to Show view.
The Show view simply outputs the timestamp value as shown below:
<h1>TimeStamp : @Model</h1>


<h2>@Html.ActionLink("Go back", "Index", "Home")</h2>
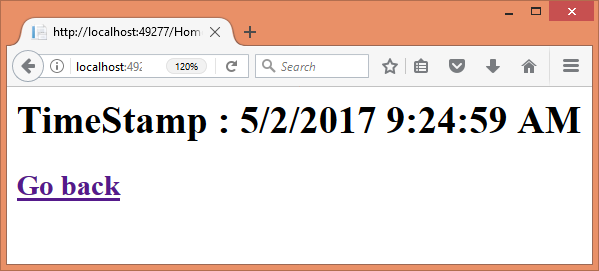
To test what you wrote so far, run the application. Navigate to /Home/Index first so that timestamp key is assigned. Then navigate to /Home/Show and see whether timestamp value gets outputted. The following image shows a sample run of the Show() action.
5. You can use TryGet() to check whether a key is present in the cache
If you observe the previous example, you will find that every time you navigate to the /Home/Index, a new timestamp is assigned to the cached item. This is because we didn't put any check to assign the value only if the item doesn't exists. Many a times you would like to do just that. There are two ways to perform that check inside Index() action. Both are shown below:
// first way

if (string.IsNullOrEmpty(cache.Get<string>("timestamp")))

{

    cache.Set<string>("timestamp", DateTime.Now.ToString());

}


// second way

if (!cache.TryGetValue<string>("timestamp", out string timestamp))

{

    cache.Set<string>("timestamp", DateTime.Now.ToString());

}
The first way uses the same Get() method you used earlier. However, this time it is used along with an if block. If the Get() can't find the specified item in the cache, IsNullOrEmpty() will return true. And only then Set() gets called to add that item.
The second way is more elegant. It uses TryGet() method to retrieve an item. The TryGet() method returns a boolean value indicating whether the item was found or not. The actual item can be pulled out using an output parameter. If TryGet() returns false, Set() is used to add that entry.
6. You can use GetOrCreate() to add an item if doesn't exist
Sometimes you need to retrieve an existing item from the cache. And if that item doesn't exist you want it to be added. These two tasks - get if it exist OR create it if it doesn't - can be accomplished using GetOrCreate() method. The modified Show() method shows how this can be done.
public IActionResult Show()

{

    string timestamp = cache.GetOrCreate<string>("timestamp", entry =>

    {

        return DateTime.Now.ToString();

    });

    return View("Show",timestamp);

}
The Show() action now uses GetOrCreate() method. The GetOrCreate() method checks whether timestamp key is present or not. If yes the existing value will be assigned to the local variable. Otherwise a new entry is created and added to the cache based on the logic specified in the second parameter.
To test this code run /Home/Show directly without navigating to /Home/Index. You will still see a timestamp value outputted because GetOrCreate() now adds it if it isn't already present.
7. You can set absolute and sliding expiration on a cached item
In the preceding examples, a cache item once added remains in the cache unless it is explicitly removed using the Remove() method. You can also set absolute expiration and sliding expiration on a cached item. An absolute expiration means a cached item will be removed an an explicit date and time. Sliding expiration means a cached item will be removed it is remains idle (not accessed) for a certain amount of time.
To set either of these expiration policies on a cached item you use MemoryCacheEntryOptions object. The following code shows how MemoryCacheEntryOptions can be used.
MemoryCacheEntryOptions options = new MemoryCacheEntryOptions();

options.AbsoluteExpiration = DateTime.Now.AddMinutes(1);

options.SlidingExpiration = TimeSpan.FromMinutes(1);

cache.Set<string>("timestamp", DateTime.Now.ToString(), options);
The above code from the modified Index() action creates an object of MemoryCacheEntryOptions. It then sets AbsoluteExpiration property to a DateTime value one minute from now. It also sets the SlidingExpiration property to one minute. These values indicate that the item will be removed from the cache after one minute irrespective of whether it is accessed or not. Moreover, if that item remains idle for one minute it will be removed from the cache.
Once the AbsoluteExpiration and SlidingExpiration values are set, the Set() method is used to add an item to the cache. This time the MemoryCacheEntryOptions object is passed as the third parameter of the Set() method.
8. You can wire a callback when an item is removed from the cache
At times you may want to be notified whenever a cached item is removed from the cache. There could be several reasons why an item gets removed from cache. For example, an item might get removed due to explicit call to Remove() method, it might get removed because its AbsoluteExpiration or SlidingExpiration values were reached and so on.
To know when an item is removed from the cache you need to wire a callback function. The following code shows how that is done.
MemoryCacheEntryOptions options = new MemoryCacheEntryOptions();

options.AbsoluteExpiration = DateTime.Now.AddMinutes(1);

options.SlidingExpiration = TimeSpan.FromMinutes(1);

options.RegisterPostEvictionCallback(MyCallback, this);

cache.Set<string>("timestamp", DateTime.Now.ToString(), options);
The above code is quite similar to the previous example in that it uses MemoryCacheEntryOptions to configure the AbsoluteExpiration and SlidingExpiration. More importantly it also calls the RegisterPostEvictionCallback() method to wire a callback function just discussed. In this case the callback function name is MyCallback. The second parameter is a state object that you wish to pass to the callback function. Here we pass the HomeController instance (this points to the current HomeController object) as the state.
The MyCallback function mentioned looks like this:
private static void MyCallback(object key, object value, EvictionReason reason, object state)

{

    var message = $"Cache entry was removed : {reason}";

    ((HomeController)state).cache.Set("callbackMessage", message);

}
Observe this code carefully. The MyCallback() is a private static function inside the HomeController class. It has four parameters. The first two parameters represent the key and value of the cached item that was just removed. The third parameter indicates the reason why the item was removed. The EvictionReason is an enumeration and holds various possible reasons such as Expired, Removed and Replaced.
Inside the callback function we just form a string message based on the reason of removal. We want to set this message as another cache item. This needs access to the cache object of the HomeController. That's where the state parameter can be used. Using the state object you can get hold of the HomeController's cache object and Set() a callbackMessage cache item.
The callbackMessage can be accessed from the Show() action like this:
public IActionResult Show()

{

    string timestamp = cache.Get<string>("timestamp");

    ViewData["callbackMessage"] = cache.Get<string>("callbackMessage");

    return View("Show",timestamp);

}
And finally it can be displayed on the Show view:
<h1>TimeStamp : @Model</h1>


<h3>@ViewData["callbackMessage"]</h3>


<h2>@Html.ActionLink("Go back", "Index", "Home")</h2>
To test the callback, run the application and navigate to /Home/Index. Then navigate to /Home/Show and refresh the browser from time to time. At some point the timestamp item will expire due to its AbsoluteExpiration setting. And you will see the callbackMessage like this:

9. You can set priority for a cached item
Just as you can set the expiration policies of a cached item, you can also assign a priority value to a cached item. If server experiences shortage of memory based on this priority the items will be removed to reclaim the memory. To set the priority you use MemoryCacheEntryOptions again.
MemoryCacheEntryOptions options = new MemoryCacheEntryOptions();

options.Priority = CacheItemPriority.Normal;

cache.Set<string>("timestamp", DateTime.Now.ToString(), options);
The Priority property of MemoryCacheEntryOptions allows you to set a priority value for an item using CacheItemPriority enumeration. Possible values are Low, Normal, High and NeverRemove.
10. You can set a dependency between multiple cached items
You can also set a dependency between a set of cached items such than when an item is removed all the dependent items are also removed. To see how this works, modify the Index() action as shown below:
public IActionResult Index()

{

    var cts = new CancellationTokenSource();

    cache.Set("cts", cts);


    MemoryCacheEntryOptions options = new MemoryCacheEntryOptions();

    options.AddExpirationToken(new CancellationChangeToken(cts.Token));

    options.RegisterPostEvictionCallback(MyCallback, this);

    cache.Set<string>("timestamp", DateTime.Now.ToString(), options);


    cache.Set<string>("key1", "Hello World!", new CancellationChangeToken(cts.Token));

    cache.Set<string>("key2", "Hello Universe!", new CancellationChangeToken(cts.Token));


    return View();

}
The code begins by creating a CancellationTokenSource object and the object is stored as an independent cached item cts. Then MemoryCacheEntryOptions object is created as before. This time AddExpirationToken() method of MemoryCacheEntryOptions is called to specify an expiration token. We won't go into the details of CancellationChangeToken here. It is suffice to say that an expiration token allows you to expire an item. If the token is active the item stays in the cache but if the token is cancelled the item is removed from the cache. Once the item is removed from the cache MyCallback is called as before. Then the code creates two more items - key1 and key2. While adding these two items the third parameter of Set() passes a CancellationChangeToken based on cts object created earlier.
That means here we have three keys - timestamp is the primary key, key1 and key2 are dependent on timestamp. When timestamp is removed key1 and key2 should also get removed. To remove timestamp you need to cancel its token somewhere in the code. Let's do that in a separate action - Remove().
public IActionResult Remove()

{

    CancellationTokenSource cts = cache.Get<CancellationTokenSource>("cts");

    cts.Cancel();

    return RedirectToAction("Show");

}
Here we retrieve the CancellationTokenSource object stored earlier and call its Cancel() method. Doing so will remove timestamp, key1 as well as key2. You can confirm that by retrieving all these three keys in the Show() action.
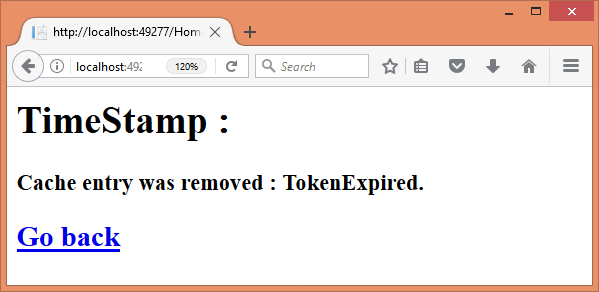
In order to test this example, run the application and navigate to /Home/Index. Then navigate to /Home/Show and check whether all the three key values are being shown as expected. Then navigate to /Home/Remove. You will be redirected back to /Home/Show. Since Remove() cancelled the token all the keys will be removed and now the Show view will show the reason for expiration (TokenExpired) like this:
That's it for now! Keep coding!!!