The final part of our series brings the user interface to life, integrating our secure ASP.NET 8 Web API with a React and Redux frontend. In this article, we’ll cover how to manage authentication states, securely store and handle authentication tokens, and communicate with the backend API from your React application. We’ll also delve into best practices for protecting routes and managing user sessions in a SPA (Single Page Application) context. By the end of this guide, you’ll have a fully functional, secure web application with a modern, reactive frontend that seamlessly interacts with your ASP.NET backend. This part is essential for developers looking to bridge the gap between backend security and frontend user experience.
Part 1: Setting up API
Part 2: Setting up integration tests for API project
Part 3: Setting up React client
Web project: React frontend
The web project is created with Vite. We are using ReduxJS Toolkit for state management, Ant Design (AntD) for frontend design, and Axios for API call management.
Visual Studio 2022 provides a new JavaScript project type, and we are utilizing that for our project.
Javascript project type for Visual Studio
Let’s go through the most important files to understand how the project is wired up.
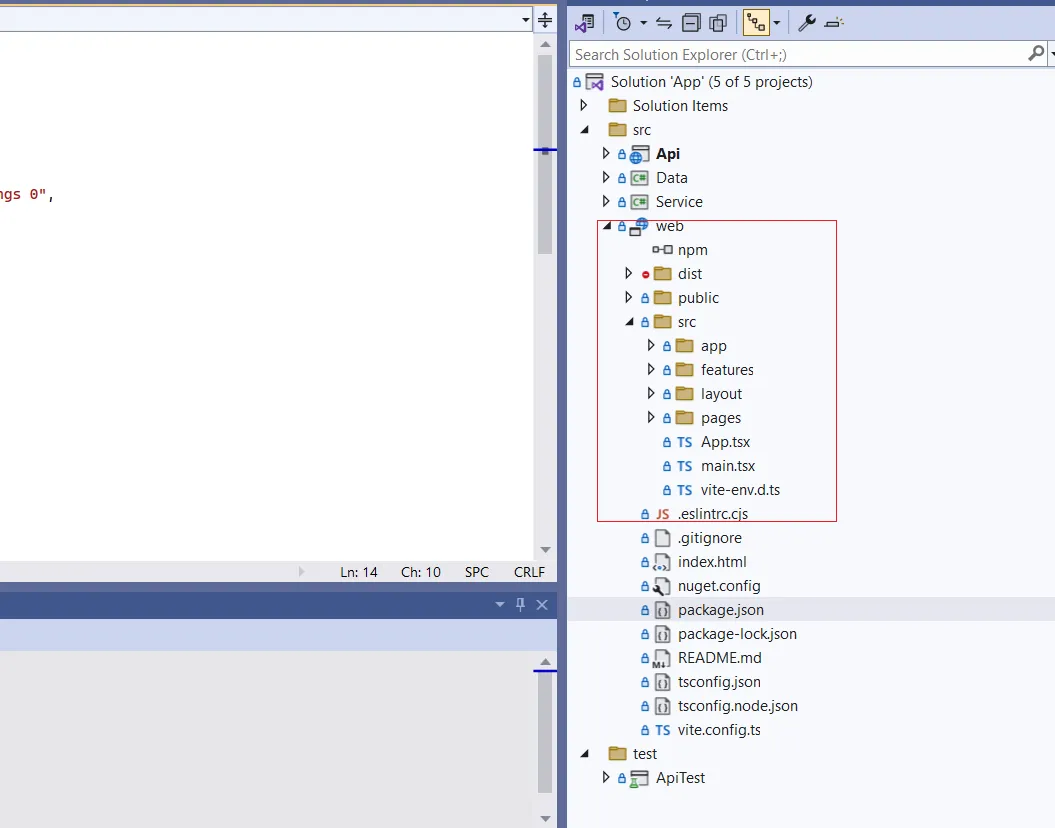
Web project files
In our application, the entry point is main.tsx, where we configure fundamental aspects such as Redux state management, client-side routing using React Router, and an Axios API interceptor. This file initializes the React app, wraps it in StrictMode for enhanced development checks, and renders the main ‘App’ component within the specified ‘root’ element in the HTML document.
import React from "react";

import ReactDOM from "react-dom/client";

import App from "./App.tsx";

import { BrowserRouter } from "react-router-dom";

import { Provider } from "react-redux";

import { store } from "./app/store.ts";

import { AxiosApiInterceptor } from "./app/AxiosApiInterceptor.ts";


ReactDOM.createRoot(document.getElementById("root")!).render(

  <React.StrictMode>

    <Provider store={store}>

      <BrowserRouter>

        <AxiosApiInterceptor />

        <App />

      </BrowserRouter>

    </Provider>

  </React.StrictMode>

);
store.ts sets up the Redux store configuration for a React application using the @reduxjs/toolkit library. It defines an authentication reducer (authReducer) and combines it with state persistence using redux-persist. The configureStore function creates the Redux store, enabling DevTools during development. The persistStore function is used to create a persisted version of the store, ensuring that the authentication state persists across page reloads. Additionally, type definitions (AppDispatch, RootState, and AppThunk) are provided for consistent use throughout the application. Overall, this configuration facilitates efficient state management, asynchronous actions, and persistent storage for the authentication slice of the Redux store.
import {

  configureStore,

  ThunkAction,

  Action,

  combineReducers,

} from "@reduxjs/toolkit";

import authReducer from "../features/user/authSlice";

import storage from "redux-persist/lib/storage";

import { persistReducer, persistStore } from "redux-persist";

import thunk from "redux-thunk";


const authPersistConfig = {

  key: "auth",

  storage:storage,

};


const rootReducer = combineReducers({

  auth: persistReducer(authPersistConfig, authReducer),

});


export const store = configureStore({

  reducer: rootReducer,

  devTools: process.env.NODE_ENV !== "production",

  middleware: [thunk],

});


export const persister = persistStore(store);


export type AppDispatch = typeof store.dispatch;

export type RootState = ReturnType<typeof store.getState>;

export type AppThunk<ReturnType = void> = ThunkAction<

  ReturnType,

  RootState,

  unknown,

  Action<string>

>;
authAPI.ts defines a set of functions for making API requests related to user authentication in a React application. Utilizing Axios, the login, refreshToken, register, logout, and profileApi functions interact with a backend server at a specified base URL. Each function handles its respective endpoint, such as user login, token refresh, registration, logout, and fetching user profile. In case of any errors during API requests, the code logs the exceptions to the console. This collection of functions demonstrates a straightforward and modular approach to integrating user authentication API calls in a React application.
import axios from "axios";

import { iAppResponse } from "../../app/appResponse";


const BASE_URL = "https://localhost:1002";


export const login = async (email: string, password: string) => {

  const response = await axios.post<

  iAppResponse<{ accessToken: string; refreshToken: string }>

  >(`${BASE_URL}/user/login`, {

    email: email,

    password: password,

  }).catch((ex)=>{

    console.log(ex);

  });

  return response?.data;

};

export const refreshToken = async (data: {

  accessToken: string;

  refreshToken: string;

}) => {

  const response = await axios.post<

  iAppResponse<{ accessToken: string; refreshToken: string }>

  >(`${BASE_URL}/user/refreshToken`, data).catch((ex)=>{

    console.log(ex);

  });;

  return response?.data;

};

export const register = async (email: string, password: string) => {

  const response = await axios.post<iAppResponse<{}>>(

    `${BASE_URL}/user/register`,

    {

      email: email,

      password: password,

    }

  ).catch((ex)=>{

    console.log(ex);

  });

  return response?.data;

};

export const logout = async () => {

  const response = await axios.post<iAppResponse<boolean>>(

    `${BASE_URL}/user/logout`

  ).catch((ex)=>{

    console.log(ex);

  });;

  return response?.data;

};

export const profileApi = async () => {

  const response = await axios.post(`${BASE_URL}/user/profile`).catch((ex)=>{

    console.log(ex);

  });

  return response?.data;

};
authSlice.ts for managing authentication-related state in the application. It includes a set of reducers to update or reset authentication tokens, manage loading states, and handle logout asynchronously. Overall, this slice facilitates the centralized management of authentication-related data, making it easier to handle user authentication and related asynchronous actions within the Redux store.
import { PayloadAction, createAsyncThunk, createSlice } from "@reduxjs/toolkit";

import { RootState } from "../../app/store";

import { jwtDecode } from "jwt-decode";

import { logout } from "./authAPI";


export interface iUser {

  Id: string;

  RoleClaim: Array<string>;

  UserName: string;

}

export interface iAuthState {

  status: "idle" | "loading" | "failed";

  accessToken?: string;

  refreshToken?: string;

  user?: iUser;

}


const initialState: iAuthState = {

  status: "idle",

};

export const logoutAsync = createAsyncThunk("user/logout", async () => {

  const response = await logout();

  // The value we return becomes the `fulfilled` action payload

  return response?.data;

});

export const authSlice = createSlice({

  name: "auth",

  initialState,

  // The `reducers` field lets us define reducers and generate associated actions

  reducers: {

    updateToken: (

      state,

      action: PayloadAction<{ accessToken: string; refreshToken: string }>

    ) => {

      state.accessToken = action.payload.accessToken;

      state.refreshToken = action.payload.refreshToken;

      state.user = jwtDecode<iUser>(action.payload.accessToken);

    },

    resetToken: (state) => {

      state.accessToken = undefined;

      state.refreshToken = undefined;

      state.user = undefined;

    },

    setLoading: (state) => {

      state.status = "loading";

    },

    resetLoading: (state) => {

      state.status = "idle";

    },

  },

  extraReducers: (builder) => {

    builder

      .addCase(logoutAsync.pending, (state) => {

        state.status = "loading";

      })

      .addCase(logoutAsync.fulfilled, (state) => {

        state.status = "idle";

        state.accessToken = undefined;

        state.refreshToken = undefined;

        state.user = undefined;

      })

      .addCase(logoutAsync.rejected, (state) => {

        state.status = "failed";

      });

  },

});


export const { updateToken, resetToken, setLoading, resetLoading } = authSlice.actions;

export const selectAuth = (state: RootState) => state.auth;

export default authSlice.reducer;
AxiosApiInterceptor.ts component is a crucial part of the React application, utilizing Axios interceptors to manage authentication tokens. When a request is made, it ensures the inclusion of the access token in the Authorization header, improving security. Additionally, it monitors responses, particularly handling cases where a 401 status code indicates an expired token. In such situations, it attempts to refresh the token using a provided function. If the refresh is successful, the Redux store is updated with the new tokens, allowing the original request to be retried. If the refresh fails, or if no refresh token is available, the authentication state is reset. This component helps maintain a seamless and secure user authentication experience throughout the application.
import { useEffect } from "react";

import axios from "axios";

import {

  resetToken,

  selectAuth,

  updateToken,

} from "../features/user/authSlice";

import { useAppDispatch, useAppSelector } from "./hooks";

import { refreshToken } from "../features/user/authAPI";


export const AxiosApiInterceptor = () => {

  const authData = useAppSelector(selectAuth);

  const dispatch = useAppDispatch();

  useEffect(() => {

    const requestInterceptor = axios.interceptors.request.use(

      async (config) => {

        const accessToken = authData.accessToken;

        if (accessToken && !config.headers.Authorization) {

          config.headers.Authorization = `Bearer ${accessToken}`;

        }

        return config;

      }

    );


    // Response interceptor

    const responseInterceptor = axios.interceptors.response.use(

      (response) => response,

      async (error) => {

        if (error.response && error.response.status === 401) {

          // Token expired, attempt to refresh it

          if (authData.refreshToken && authData.accessToken) {

            // Make a refresh token request and update access token

            try {

              const response = await refreshToken({

                accessToken: authData.accessToken,

                refreshToken: authData.refreshToken,

              });

              if (response && response.isSucceed && response.data) {

                dispatch(updateToken(response.data));

                error.config.headers.Authorization = `Bearer ${response.data.accessToken}`;

                return axios.request(error.config);

              } else {

                dispatch(resetToken());

              }

            } catch (refreshError) {

              dispatch(resetToken());

              throw refreshError;

            }

          } else {

            dispatch(resetToken());

          }

        }


        return Promise.reject(error);

      }

    );


    return () => {

      // Cleanup: Remove the interceptors when the component unmounts

      axios.interceptors.request.eject(requestInterceptor);

      axios.interceptors.response.eject(responseInterceptor);

    };

  }, [authData, dispatch]);


  return null; // This component doesn't render anything

};
The remaining components are straightforward, and I trust you’ll find them self-explanatory. If you have any further inquiries or need clarification, please feel free to ask.
Summary
This code module serves as a comprehensive guide to integrating a React frontend with an authentication API. Focused on practical implementation, it employs Axios for API requests and demonstrates key functionalities such as user login, token refresh, registration, logout, and fetching user profile. The code promotes a modular and error-handling approach, logging exceptions to the console during API requests. This collection of functions showcases a robust integration of user authentication features within a React application, enhancing practicality and reliability.
Source Code
For the complete code and more examples, check out the GitHub repository: UnifiedApp