Fluent validation is a third party library for validating your models in .NET. It is totally free.
Why fluent validation?
If you already have used data annotation for validation, then you must be aware of validation in .NET. So you might be thinking why do we need fluent validation.
Fluent validation helps you to separate validation logic from your models. That makes you code clean. If you have complex validation logic, then you want to define it separately rather than making your model unreadable.
If you have small scale project and does not have complex validation logic, then using data annotation makes more sense.
You can use the hybrid validation, it is totally up to you and what suits you best. None of them is good or bad. It depends on your requirements.
Create a project or use existing one
We will create a .net core project with template .Net Core Web Api. If you have existing project (for practicing) , then it is good. Don’t waste your precious time on creating a new one.

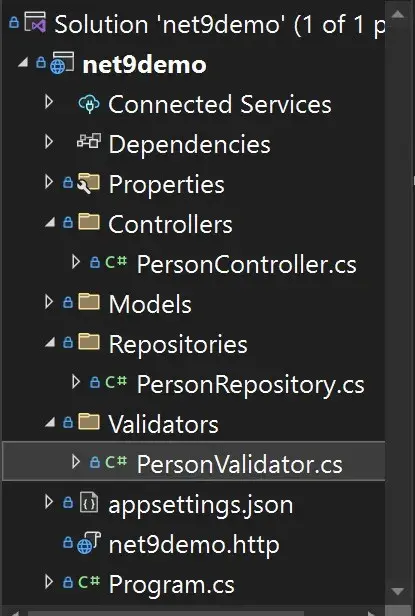
Folder structure

Model
// Models/Person.cs

public class Person

{

    public int Id { get; set; }

    public string ? Name { get; set; }

    public string? Email { get; set; }

    public int Age { get; set; }

}
Easiest way (Data annotation)
Data annotation is the easiest way to validate your models..Nothing is wrong with it. It is fast and well suited for small projects. You must be familiar it with. Below is the example of it.
// Models/Person.cs

public class Person

{

    public int Id { get; set; }

    [Required]

    [MaxLength(50)]

    public string ? Name { get; set; }

    [Required]

    [MaxLength(50)]

    public string? Email { get; set; }

    public int Age { get; set; }

}
Fluent Validation
Fluent validation is a third party library which is free. So you need to install it first.
install-package FluentValidation.AspNetCore
Remove all the data annotation from Person.cs (if you are using)
// Models/Person.cs


public class Person

{

    public int Id { get; set; }

    public string ? Name { get; set; }

    public string? Email { get; set; }

    public int Age { get; set; }

}
Validator
We will create a separate class PersonValidator inside Validators directory. There we will define all the validation logic.
Validators/PersonValidator.cs
// Validators/PersonValidator.cs


using FluentValidation;

using net9demo.Models;


namespace net9demo.Validators;


public class PersonValidator: AbstractValidator<Person>

{

    public PersonValidator()

    {

      RuleFor(person=>person.Name).NotNull().MaximumLength(50);

      RuleFor(person=>person.Email).NotNull().MaximumLength(50);

    }

}
These rules are self explanatory.
First & Second rule, Name will be not null and Maximum Length will be 50.
Program.cs
You need some configuration in Program.cs to make validation work.
builder.Services

.AddControllers()

.AddFluentValidation(fv=>fv.RegisterValidatorsFromAssemblyContaining<Person>());
Person Controller
// PersonController.cs

using Microsoft.AspNetCore.Mvc;

using net9demo.Models;


namespace net9demo.Controllers;


[Route("api/people")]

[ApiController]

public class PersonController

{

    [HttpPost]

    public IActionResult AddPerson(Person person )

    {

        try

        {

            return CreatedAtAction(nameof(AddPerson),person);

        }

        catch (Exception ex)

        {


            return StatusCode(StatusCodes.Status500InternalServerError, ex.Message);

        }

    }

}
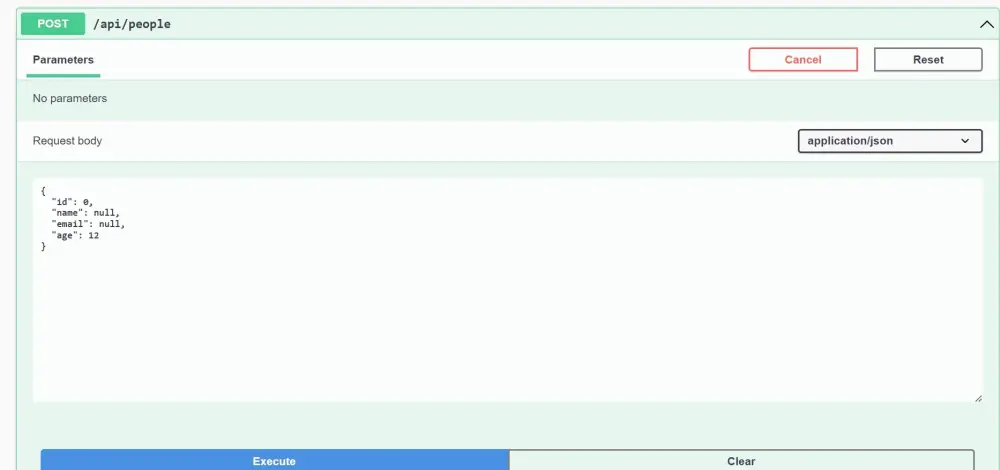
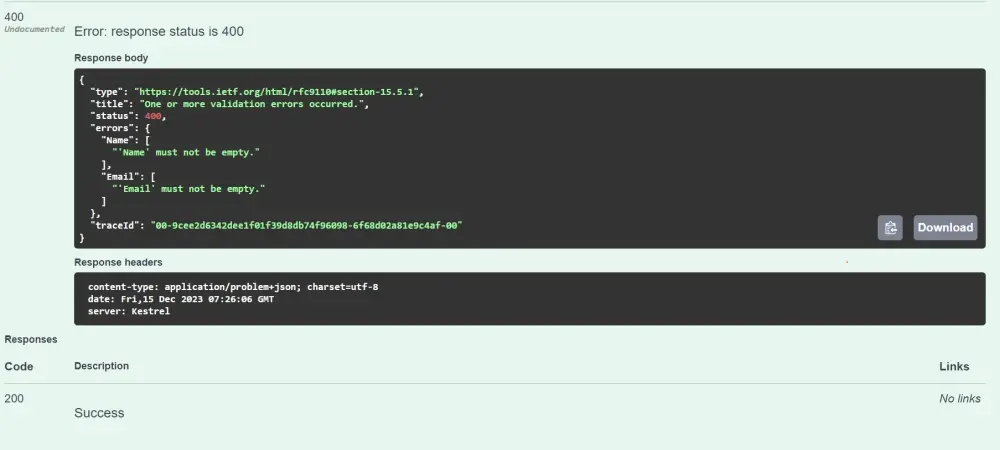
Test with Swagger UI

Request

Response
Email validator
RuleFor(person=>person.Email).NotNull().MaximumLength(50).EmailAddress();
Regular Expression and custom message
RuleFor(person => person.Password)

.NotEmpty()

.NotNull()

.MaximumLength(20)

.Matches("^(?=.*\\d).*$")

.WithMessage("Password must contain numeric value");
For more detail please visit official docs of fluent validation.